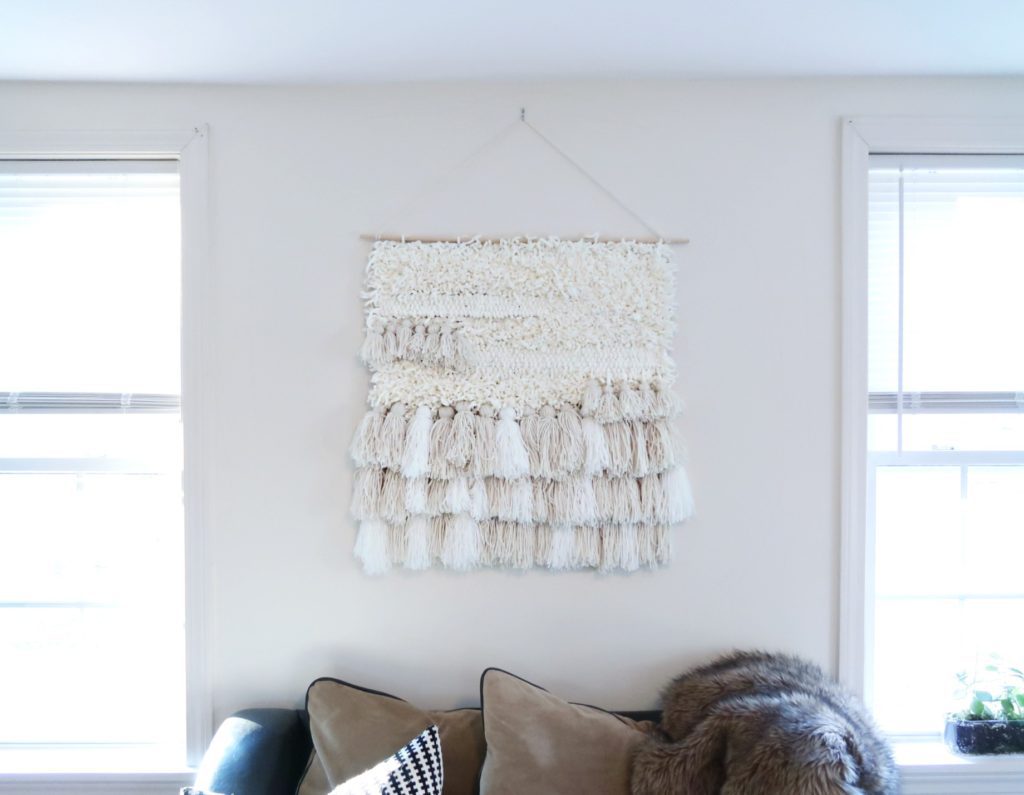
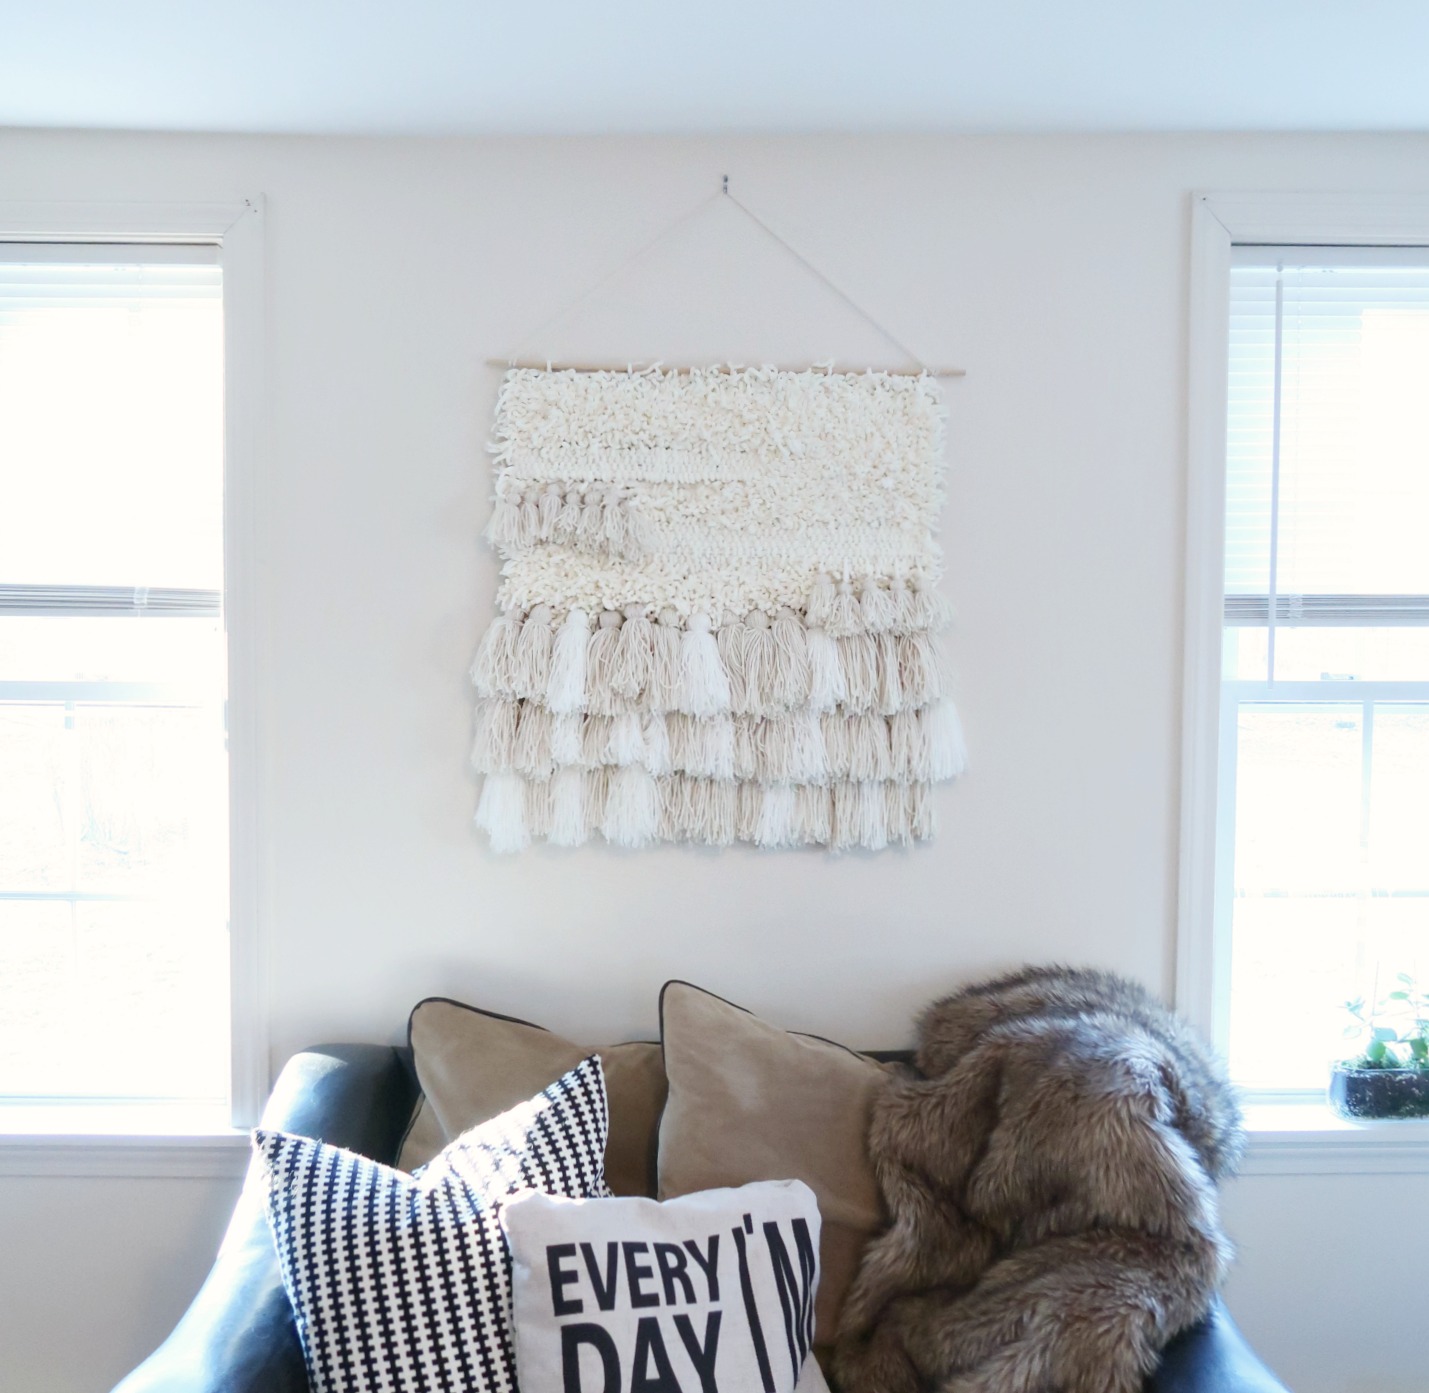
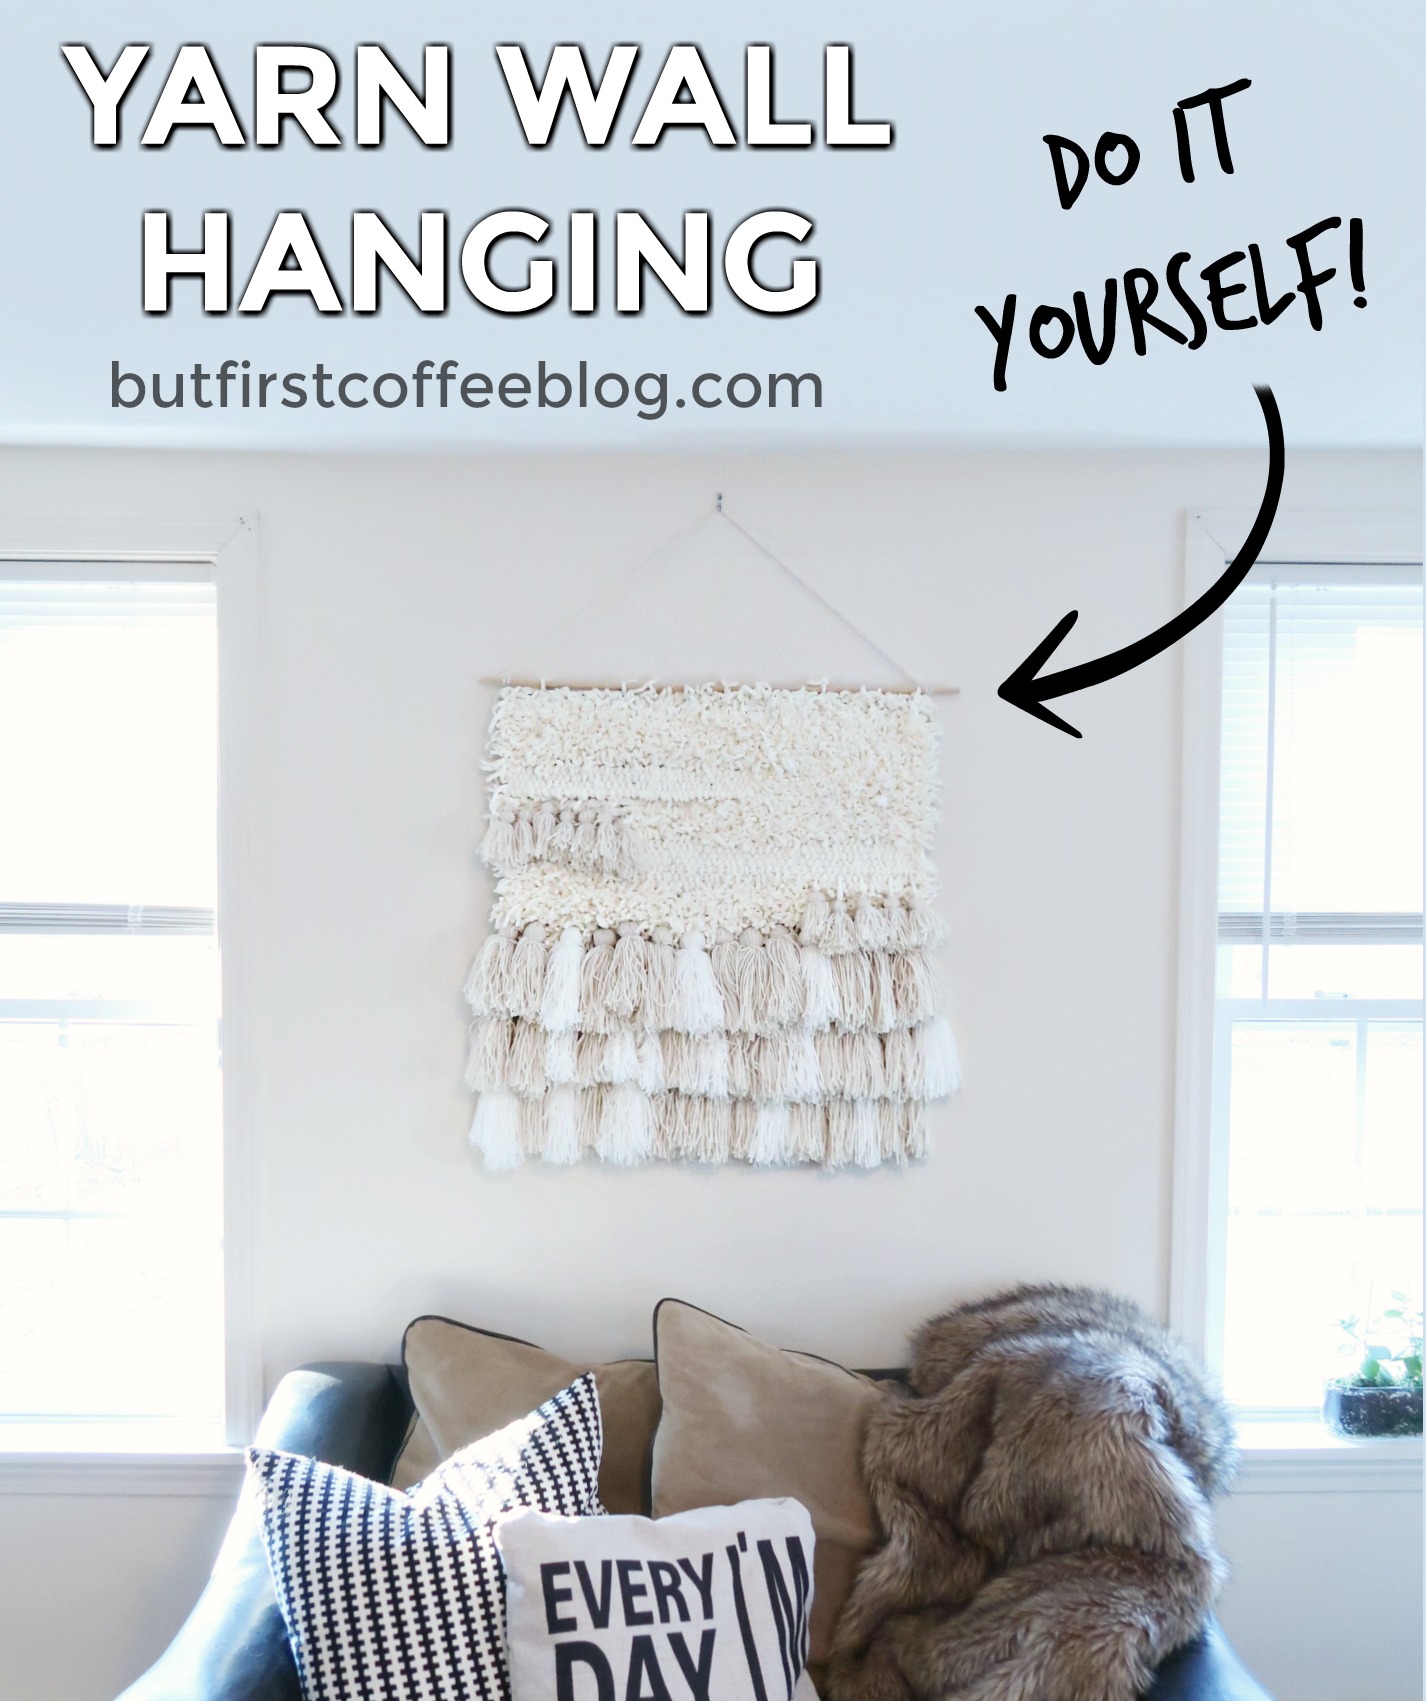
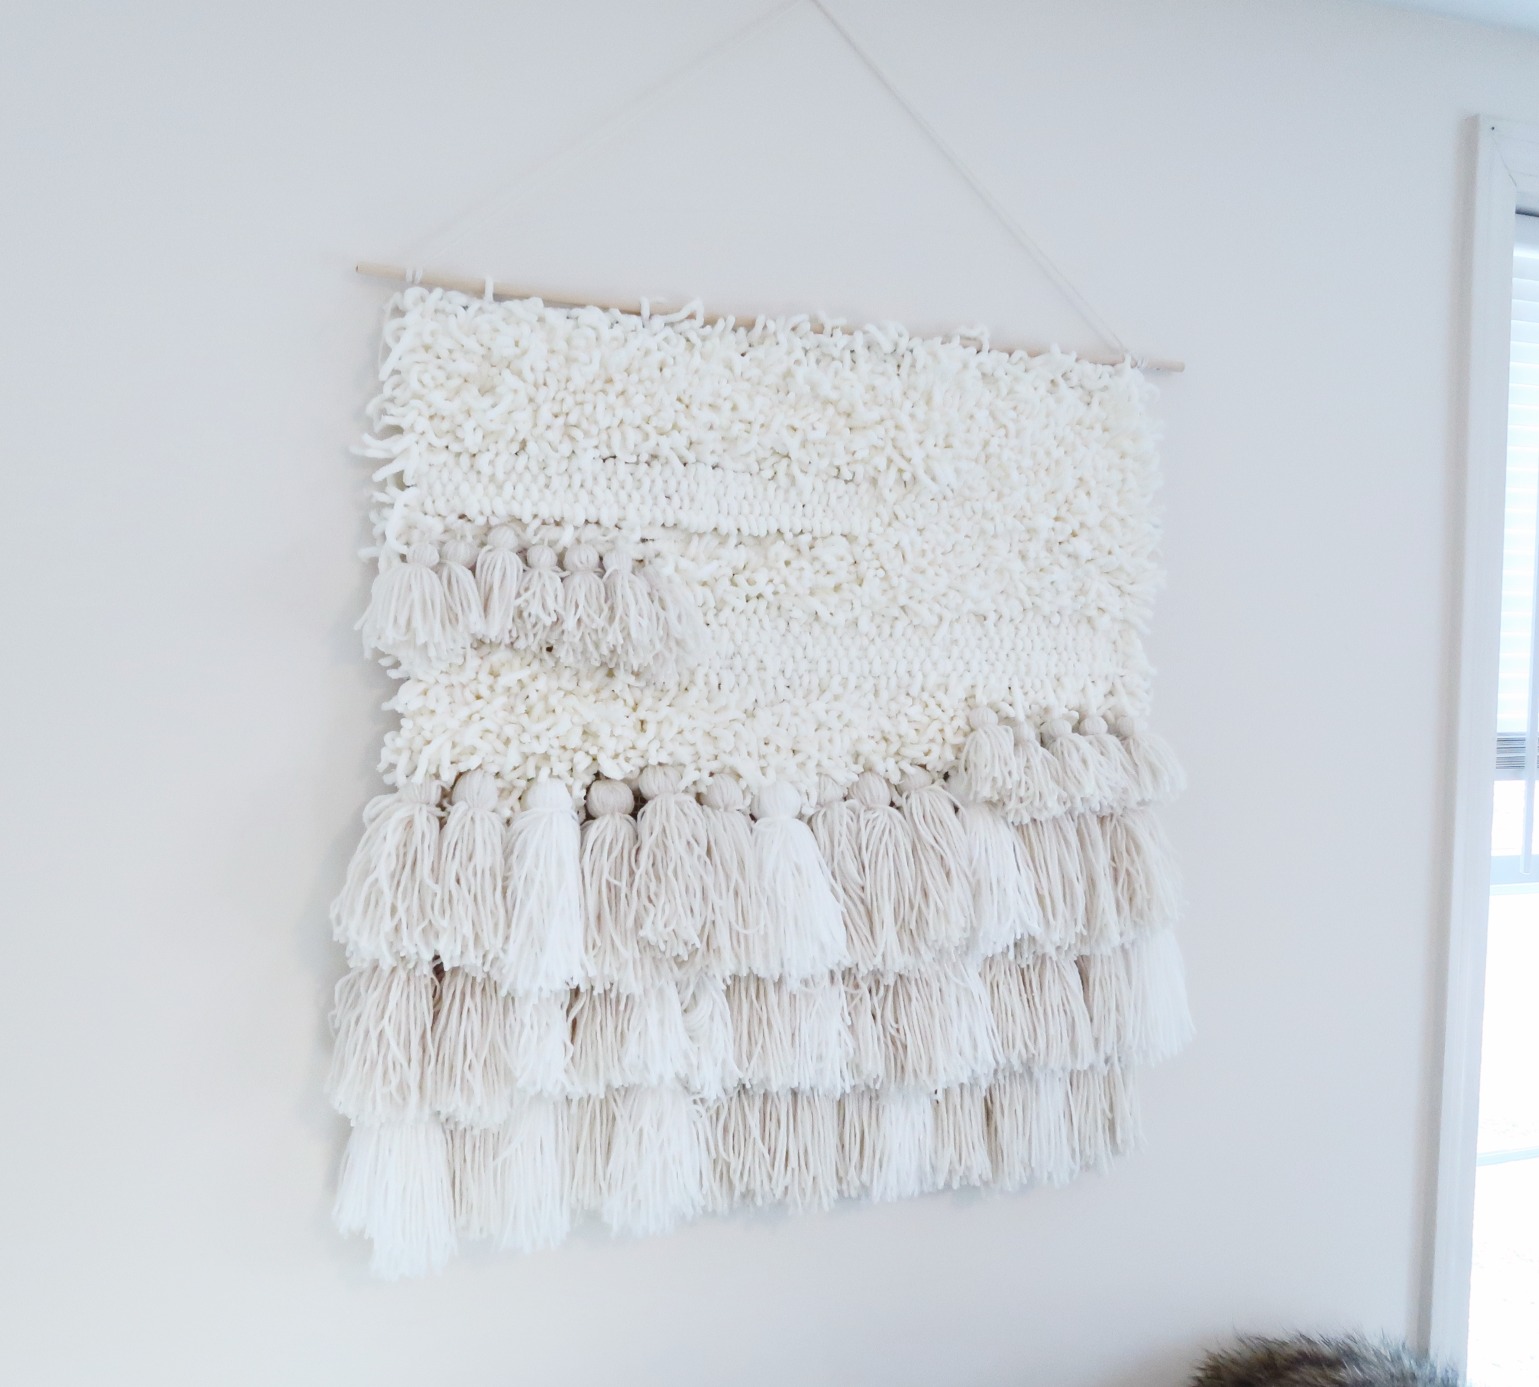
Another wall hanging? Yea, you and my husband are both asking the same thing. I can’t help it I’m on a wall hanging kick right now. BUT, if I have to be totally honest this is my favorite one, ever. I’m so pleased with how it turned out. I’m also pleased with myself because even though this is a fairly easy DIY, it was time-consuming and I’m an impatient kinda gal. I’m ALSO pleased because this wall in my house has been awkwardly empty and I’ve been fussing trying to decide what to put there. It’s just a pleased state all around this Wednesday morning.
Either way, I’m excited to share this #butfirstcoffeeDIY with you and hope it inspires you to get crafty this weekend.
What You’ll Need
How much of everything is dependent on what size hanging you make. For reference mine was about 2-1/2′ x 3′
Regular Yarn
My project used about 3-4 rolls of regular weight yarn and I used a mix of white and off-white. Before starting, I debated getting a really high-quality yarn because a lot of examples discussed 100% cotton. I decided against that because I figured the affordable option was better for my first try and I’ll be honest, I can’t tell the difference. If I had been making a blanket or rug I think it would have been worth it to go for something higher quality, but since it’s just a wall hanging, I think itlooks fine and is way more affordable.
Bulky/Thick Yarn
These come in all sorts of weights. Keep in mind the thicker you go the harder it will be to work with. I went for the standard chunky yarn, this is the one I used here. NOTE: I was able to get it for about $2 cheaper than Amazon at my local Jo-Ann Fabrics.
Latch Hook Canvas
I used this exact one – but again I was able to get it a lot cheaper at my local Jo-Ann store. I think I paid $12, and I had a coupon for 40% off one item – just sayin’
The entire project cost me maybe $20. The key is I shopped and Jo-Ann fabrics and used coupons. Jo-Ann always has coupons on their website, never cash out without them!
Step One: Make a TON of tassels
Using the regular weight yarn make your tassels. You’re probably going to need more than you initially think. For my size, I ended up needing about 40 tassels in all. If you don’t know how to make yarn tassels it’s realllllly simple, here’s an easy tutorial.
Step Two: Attach rows of tassels
After cutting the latch hook canvas to your desired size, attach the tassels. I made three rows of tassels by tying them onto my latch hook canvas about 6 squares apart each. You want to tie them close enough that there aren’t gaps but not so close that they overcrowd each other.
Step Three: Fill in the top
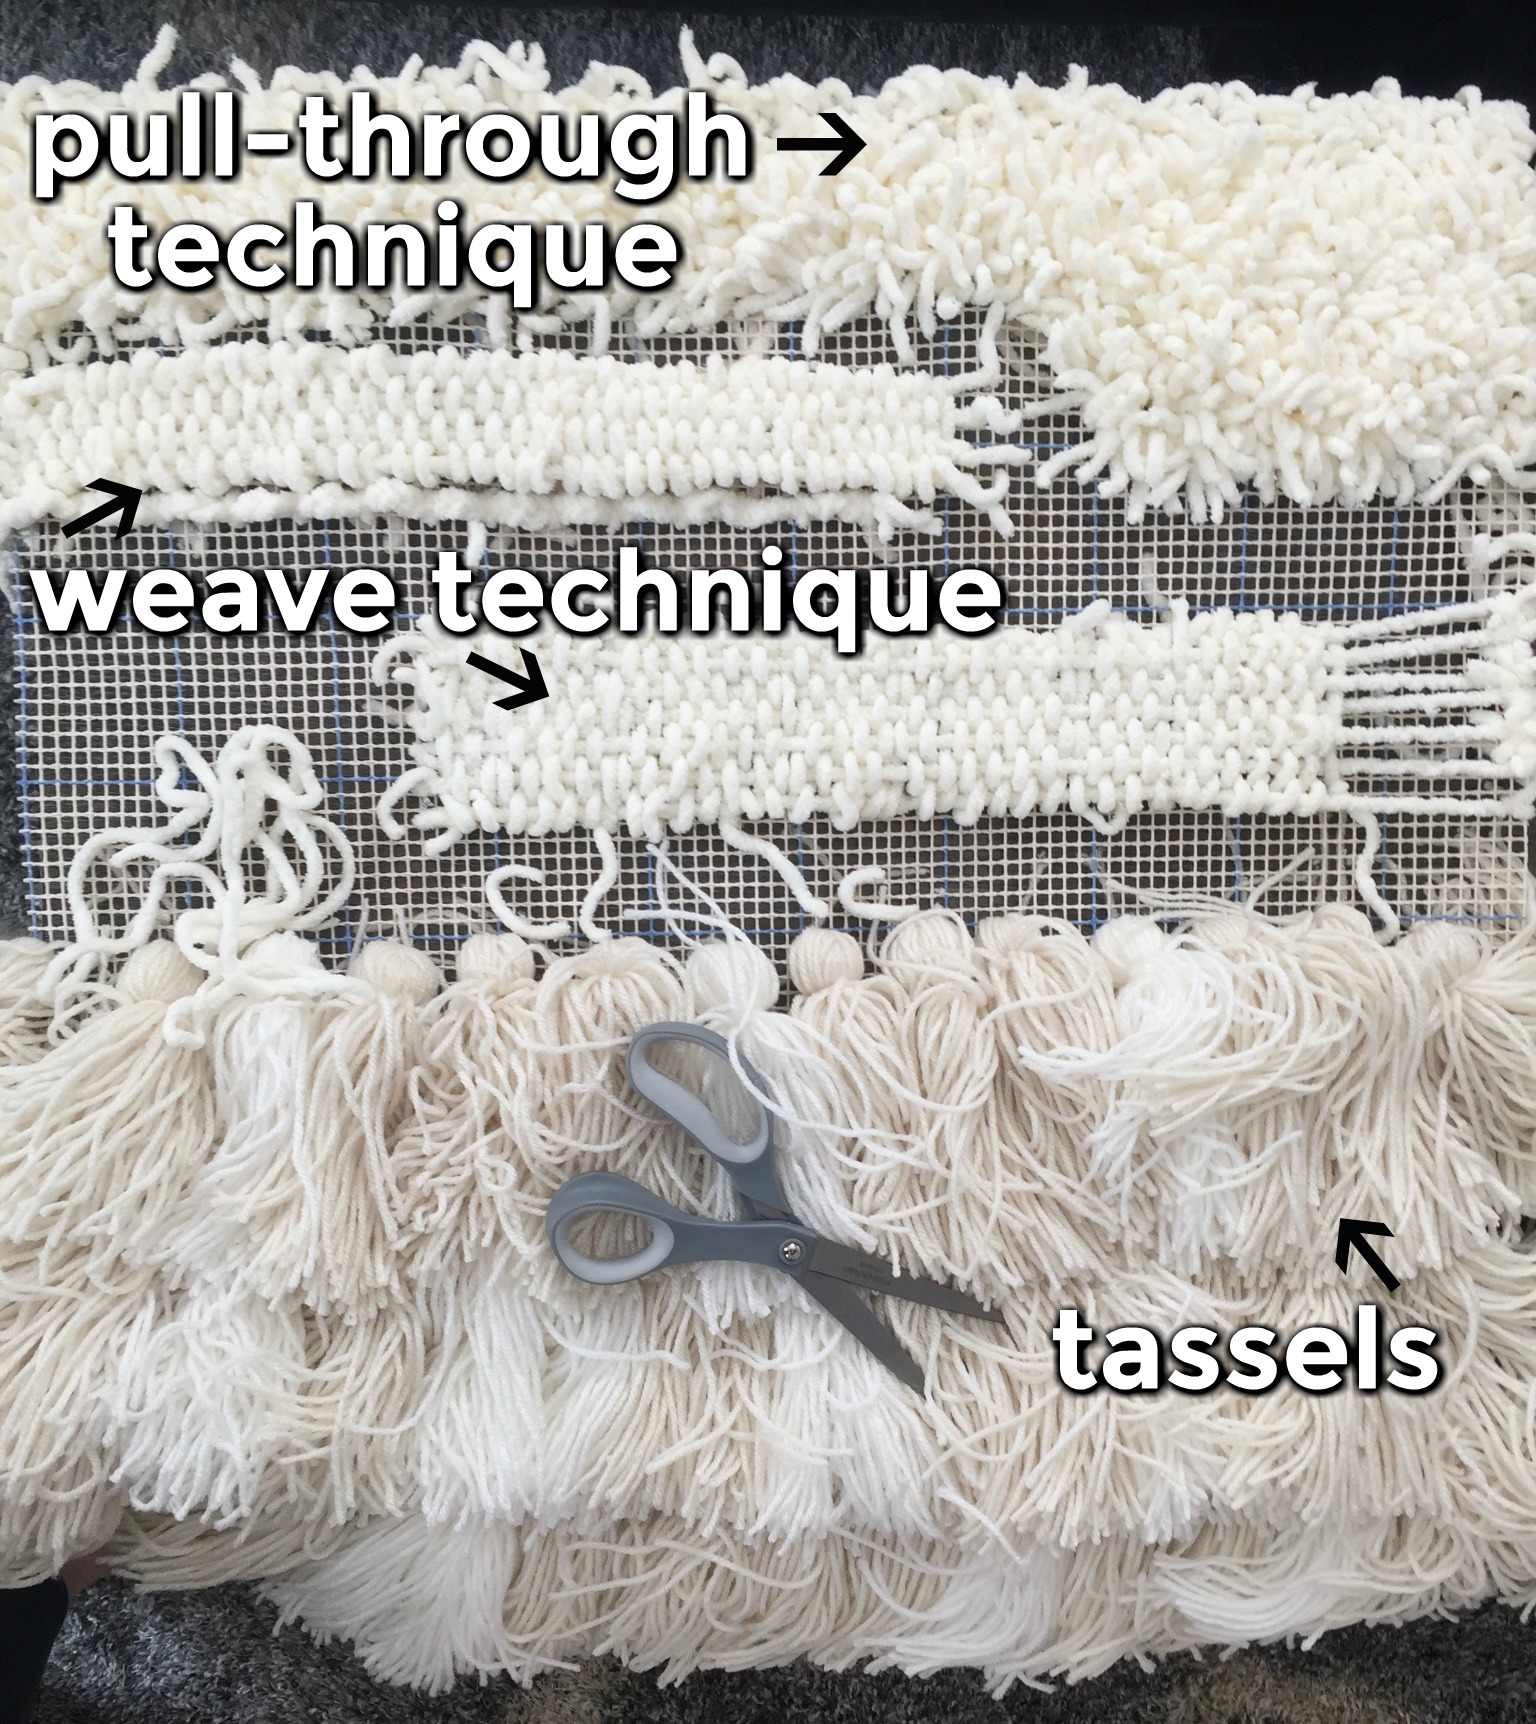
I wanted some texture to my top half, so I filled in using two different methods: Weave and Pull-Through
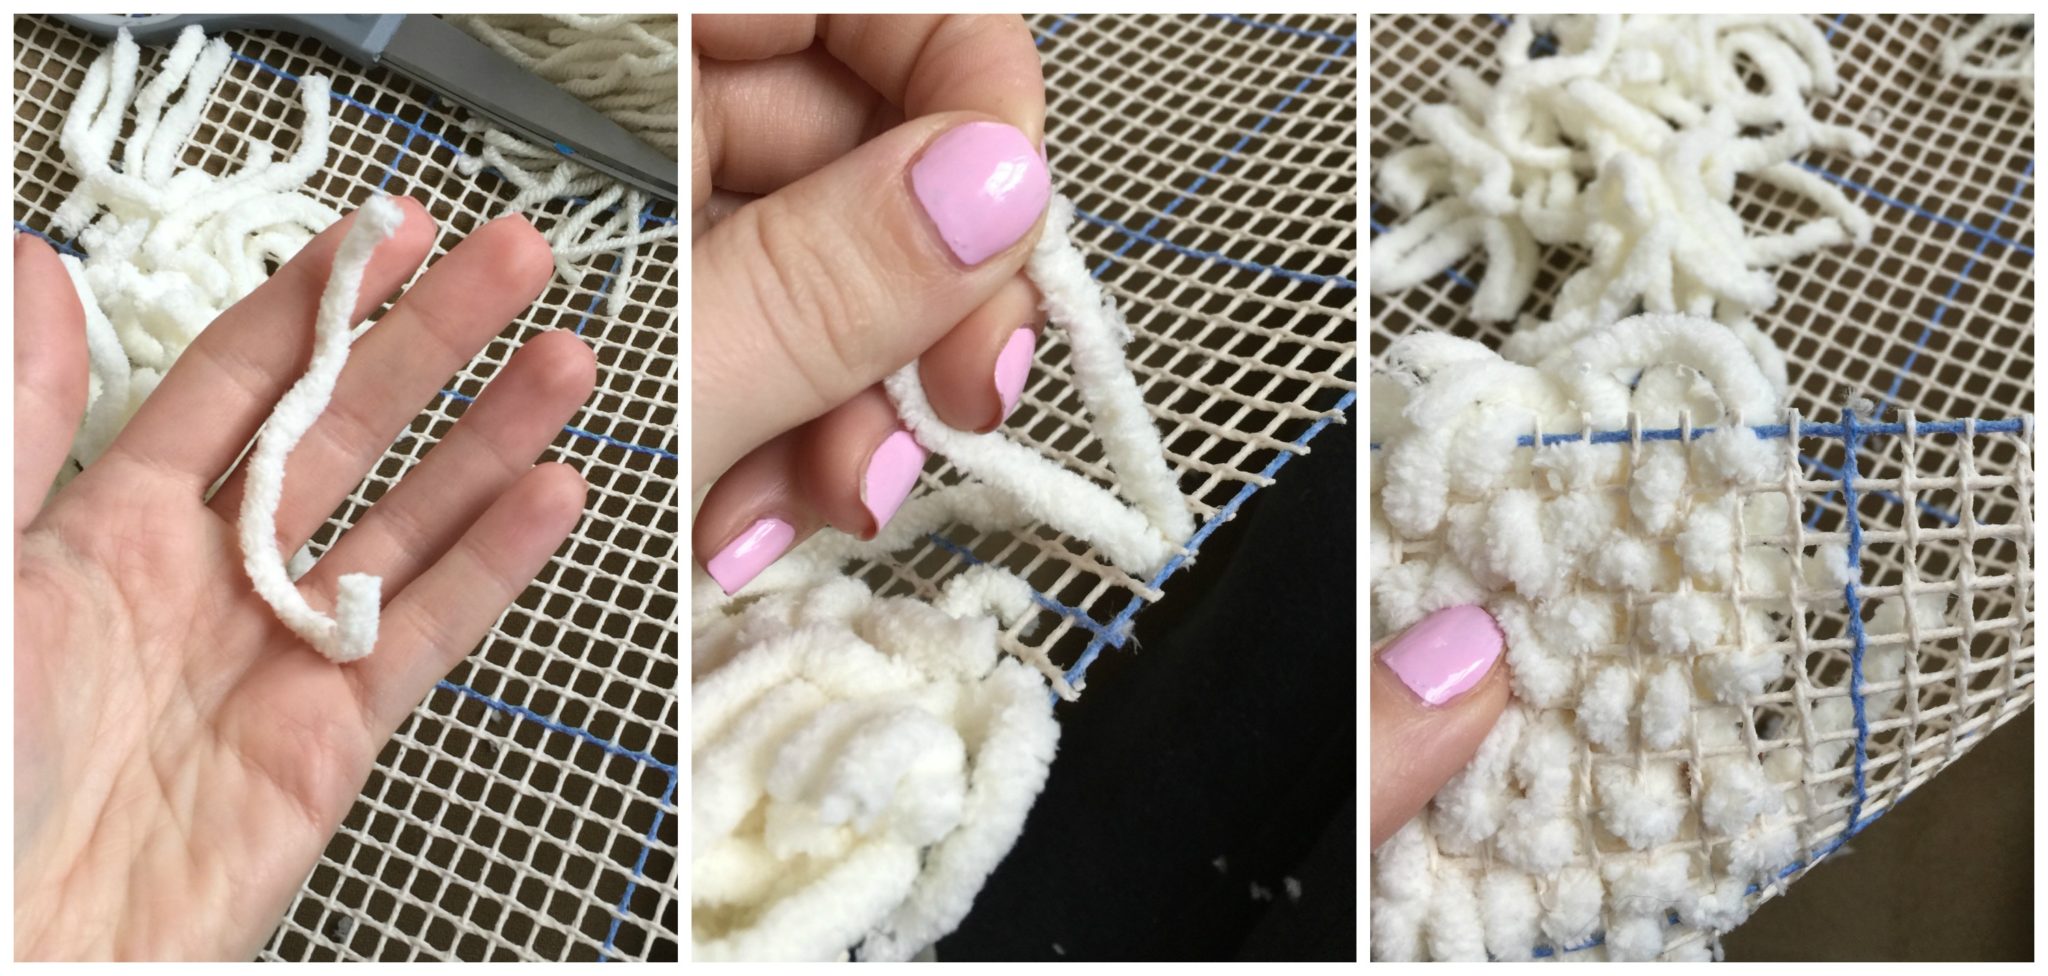
Pull Through Method: The first method I used was a pull-through method. I did this by cutting up tons of tiny pieces of the bulky yarn (about 1-1/2 inch each). I pulled them through the holes on the latch hook canvas and tied off into place. This is time-consuming but mindless, so I tied away while watching T.V or movies. This is similar to the technique you’d use if making a rug. It’s a good techinque to use for filling in gaps.
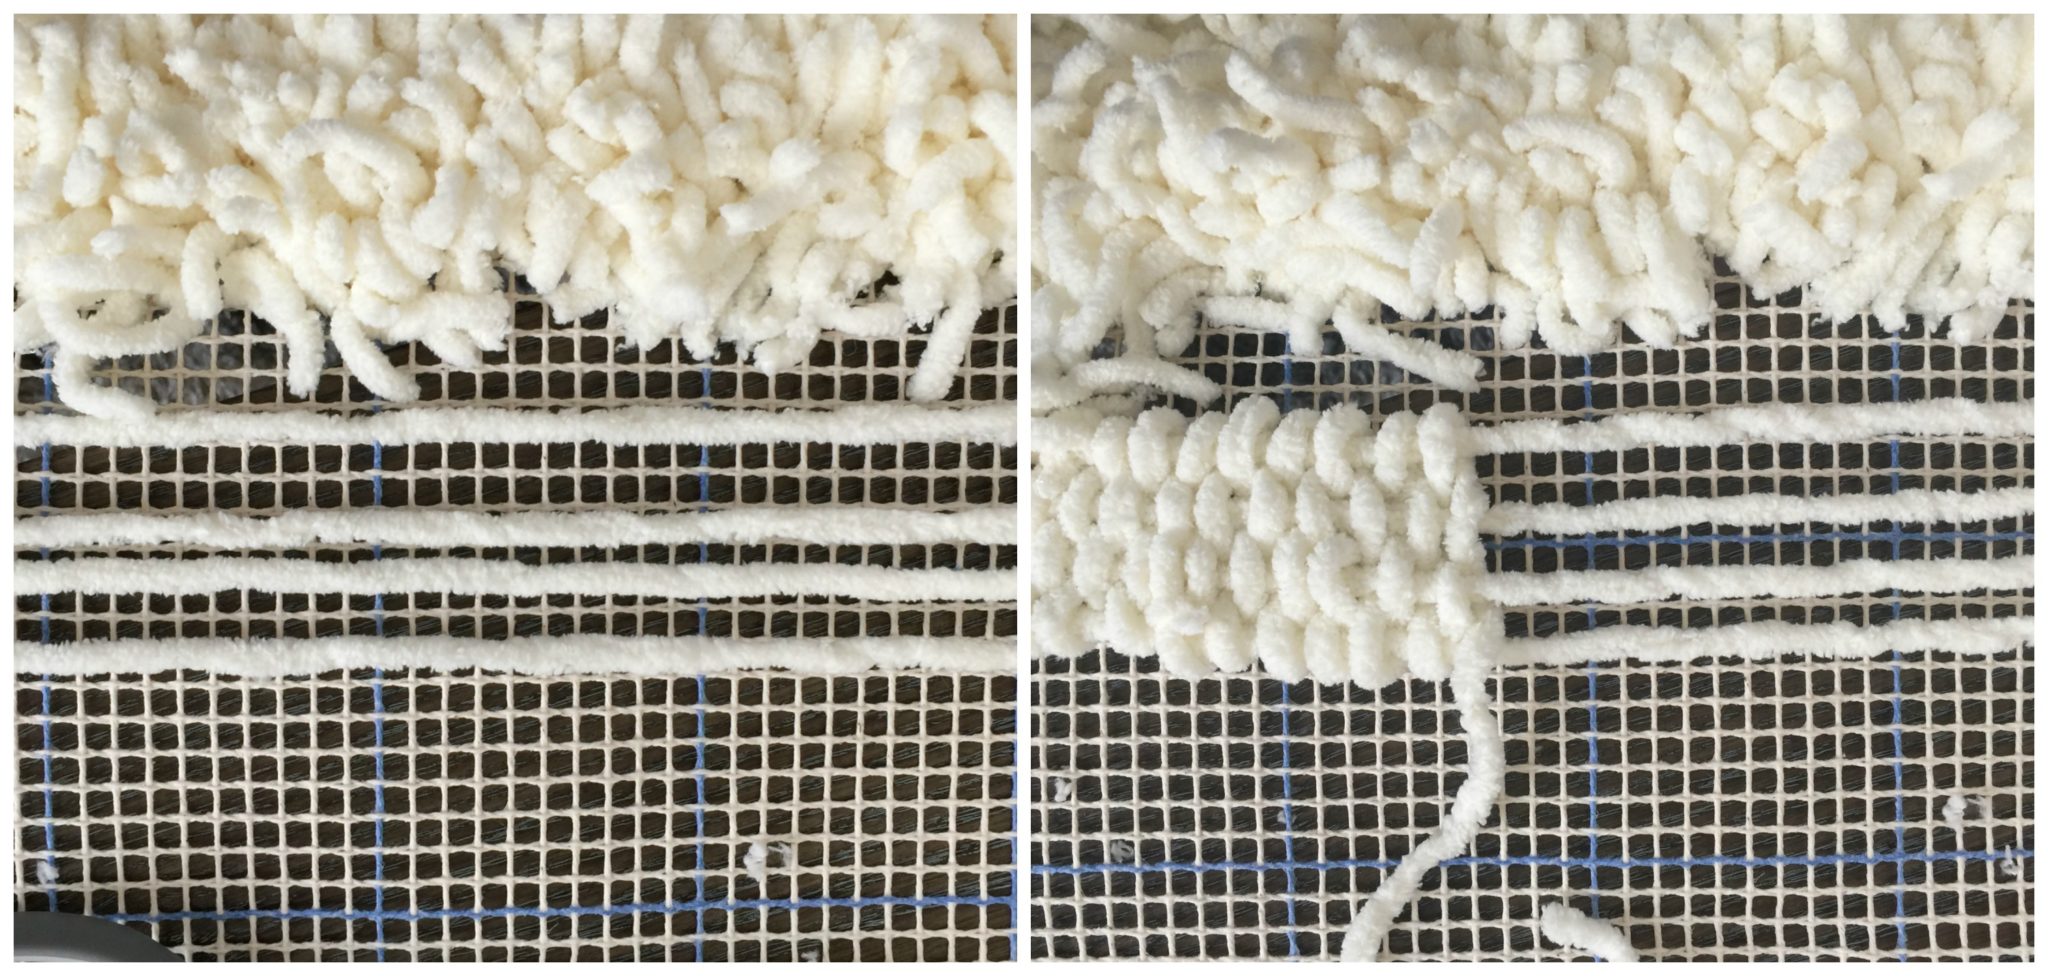
Weave method: The other method I used was a weave technique. I made two sections in the canvas where I added the “weaved” sections. Essentially I just made 3-4 rows of yarn horizontally and then used more yarn to weave through it (over under, over under.)
You could really do either one of these versions, but I liked the way it looks with both. I think the pull-through method gave me a better overall look (it’s so fluffy and fun), but I like the mixture of the patterned weaved technique.
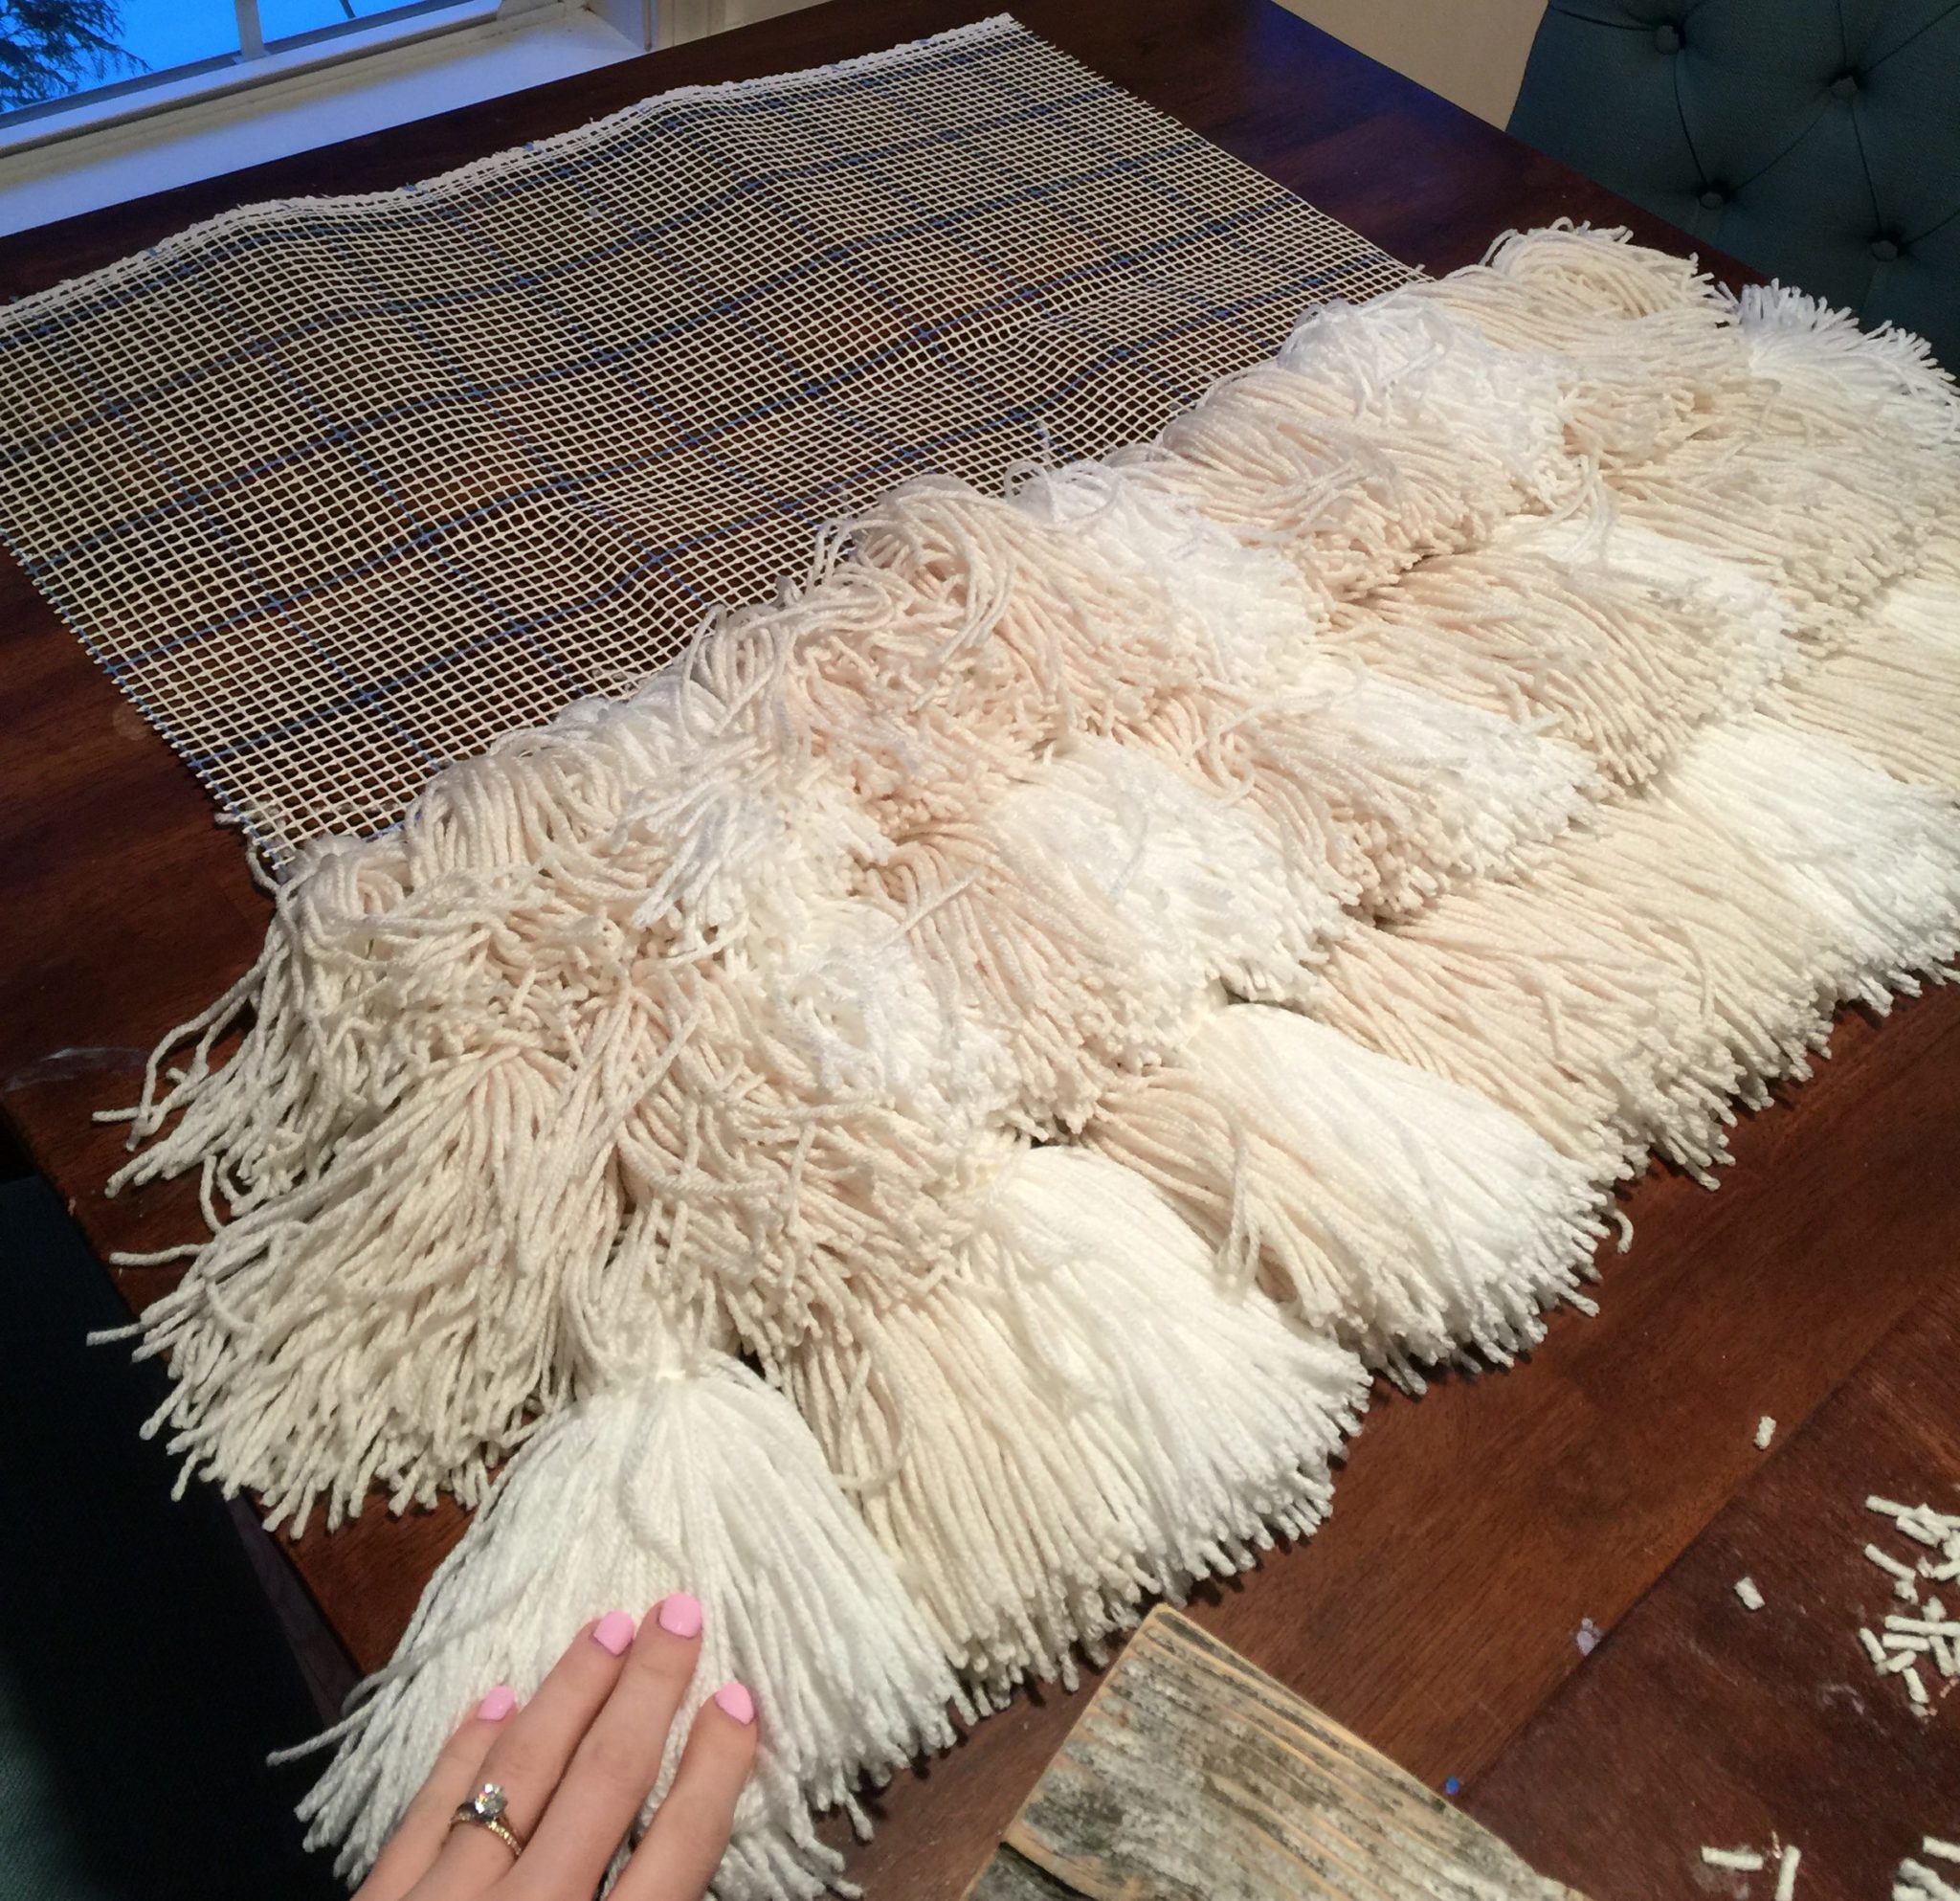
Here’s how it looked in progress. I had added the tassels, mapped out two sections for the “weave” technique, and was filling in all the extra space with the “pull through” technique.
To finish all I needed to do was fill in all the gaps using the pull-through method. The process was a little time-consuming and the entire project took me about a week (working on it little bits at night while I watched TV.) Even though it did take some time, it was actually a fairly simple process, just a lot of repetition. I watched some good documentaries in the process and now know a lot more about “the natural wonders of the world,” so, it’s not a total loss.
The last thing I did was make a few miniature tassels, about half the size of the original ones. I tied these onto two sections on the top just to add some more dimension.

The kind of fun thing about this DIY is that it’s not supposed to look perfect. The goal with a yarn wall hanging is to get something that looks handmade and imperfect. So, it’s really hard to go wrong. If you make a mistake you can cover it with a tassel, add some weaved sections, or fill in gaps with the pull-through method.
The last step was to attach a wooden dowel to the top (I just tied it onto the latch hook canvas using yarn), and string it up!
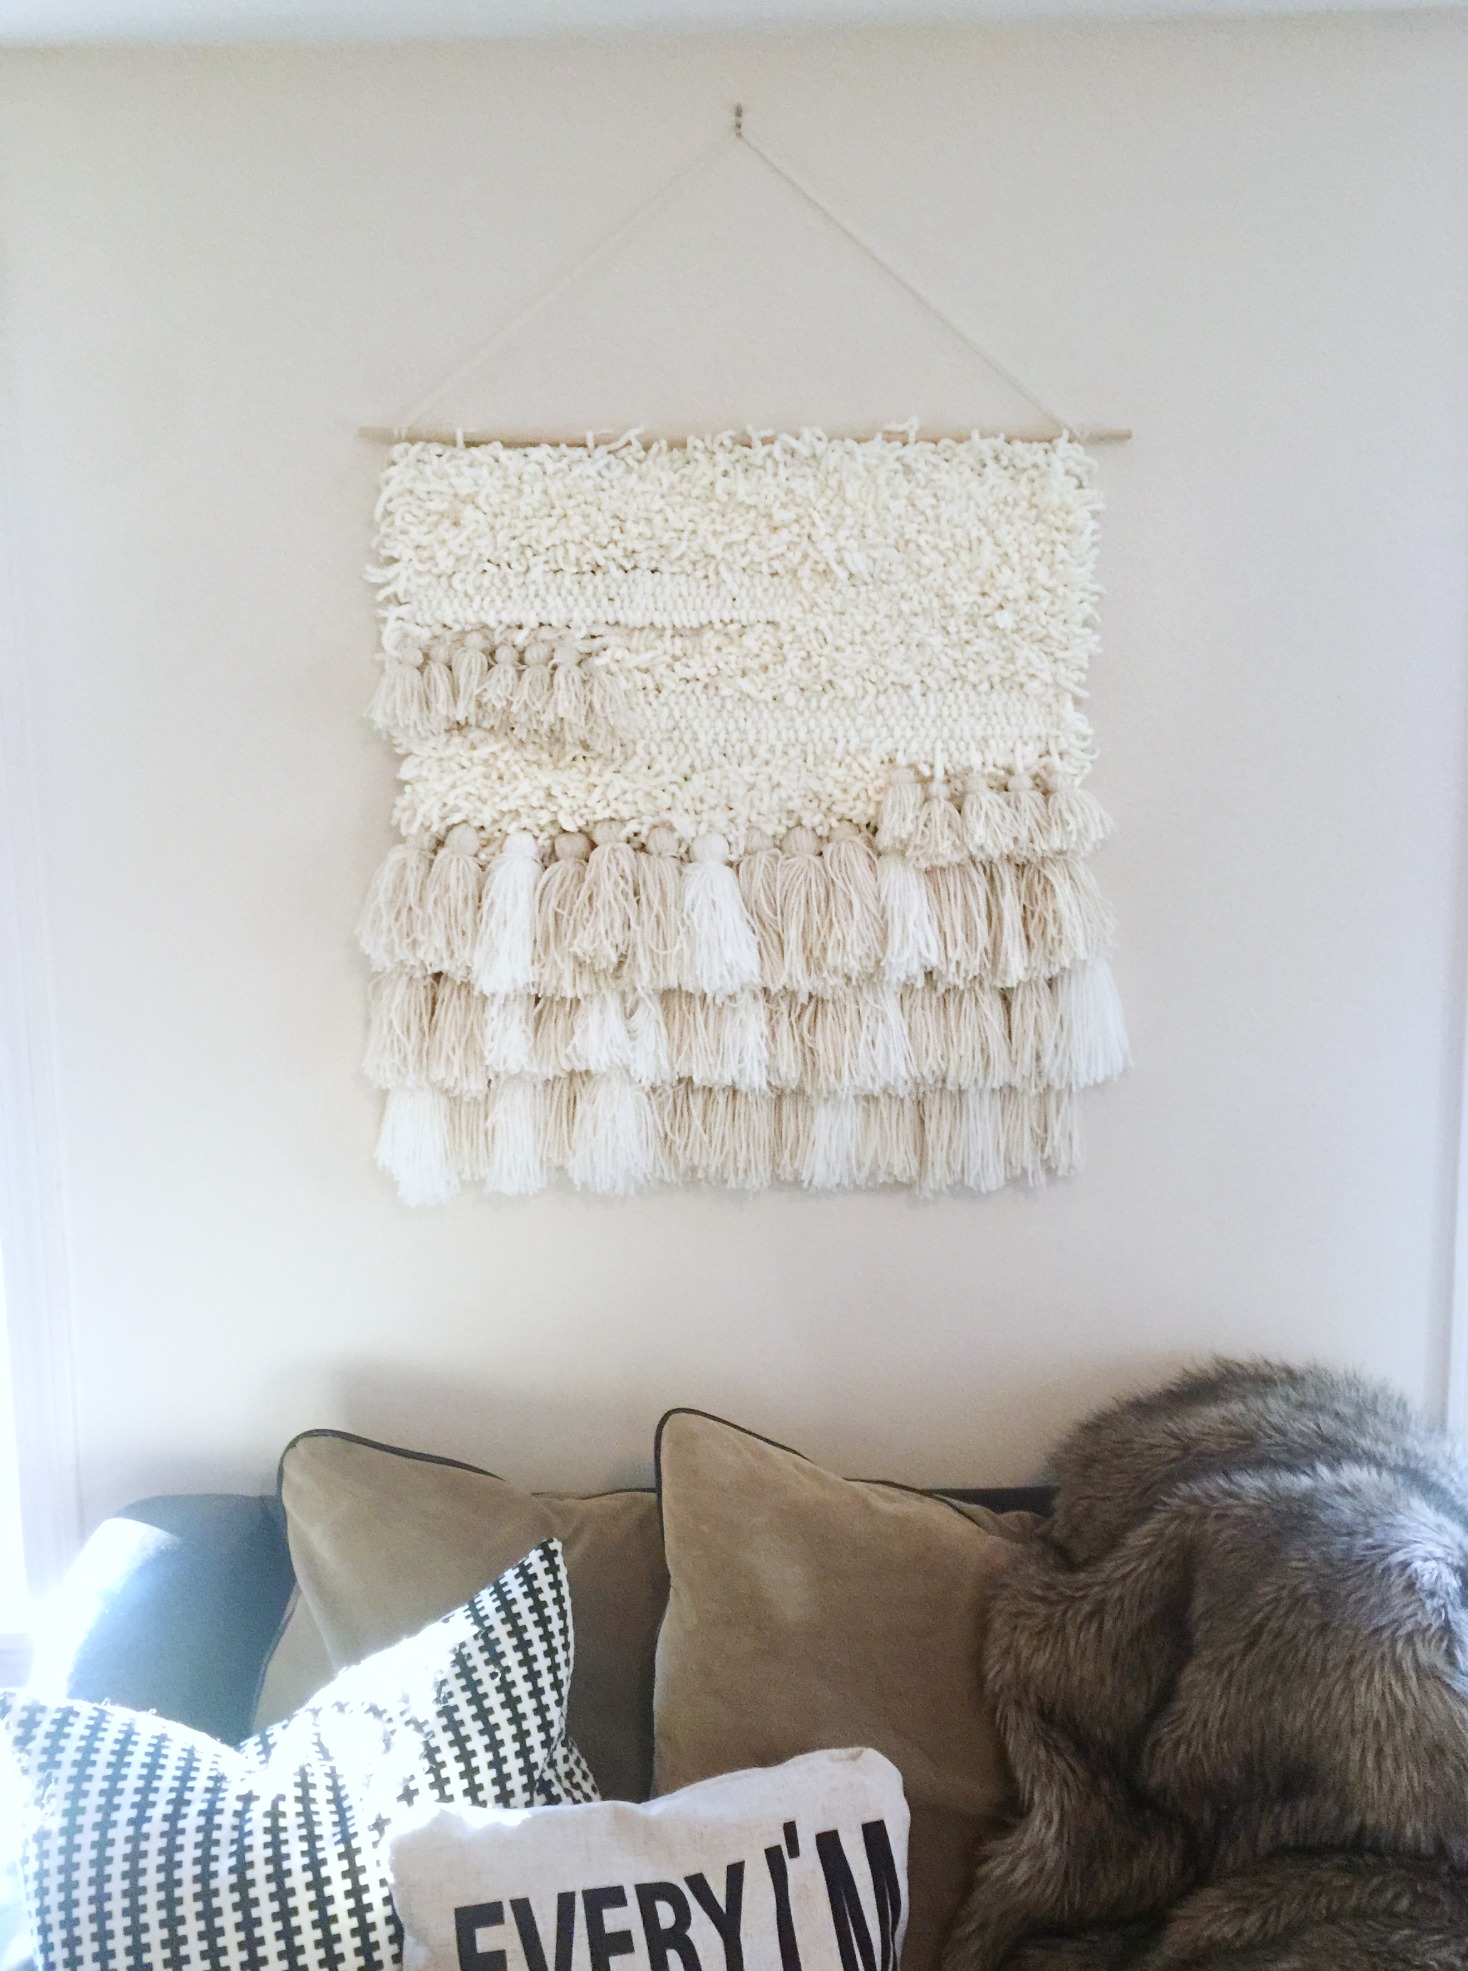
There certainly are easier yarn wall hanging methods (stay tuned I’m SURE I’ll dabble), but I think this is much more dimensional and interesting that other styles. Similar hangings I saw on Etsy and around the web were $100+, so DIYing it for about $20 was definitely a steal.
If you recreate, don’t forget to share using #butfirstcoffeeDIY. And, if you have any questions about my process feel free to let me know in the comments.
Share it:
Super simple DIY yarn wall hanging! #butfirstcoffeeDIY Click To Tweet