
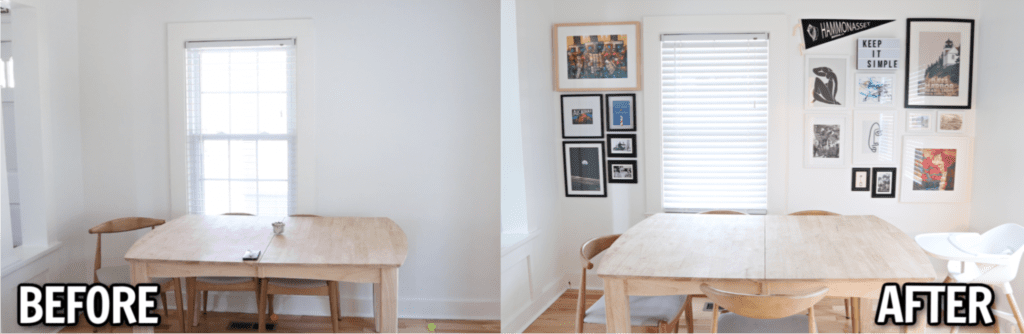
When I recently shared that I was adding a gallery wall to my space, I was flooded with a lot of questions. How do you choose your gallery wall art? Do you use a color scheme? Which frame should I use? How do you arrange the gallery wall? Tips for hanging?!
And, I know a gallery wall can feel really intimidating. But, the way I feel about it is there is no RIGHT way to hang a gallery wall. You just want something you like and brings you joy.
THAT being said…there are some general rules of thumb I follow that help me ensure a better looking, and easier to hang, gallery wall.
Prefer to watch?
Click here to jump down to the video.
Choosing the Art
Size
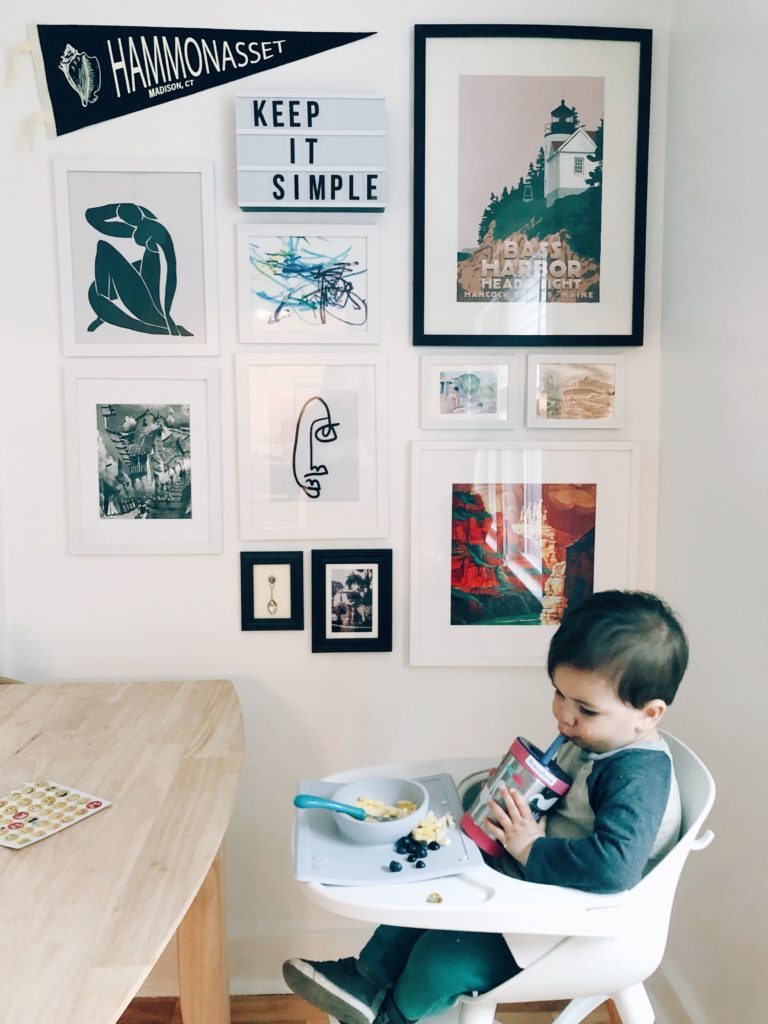
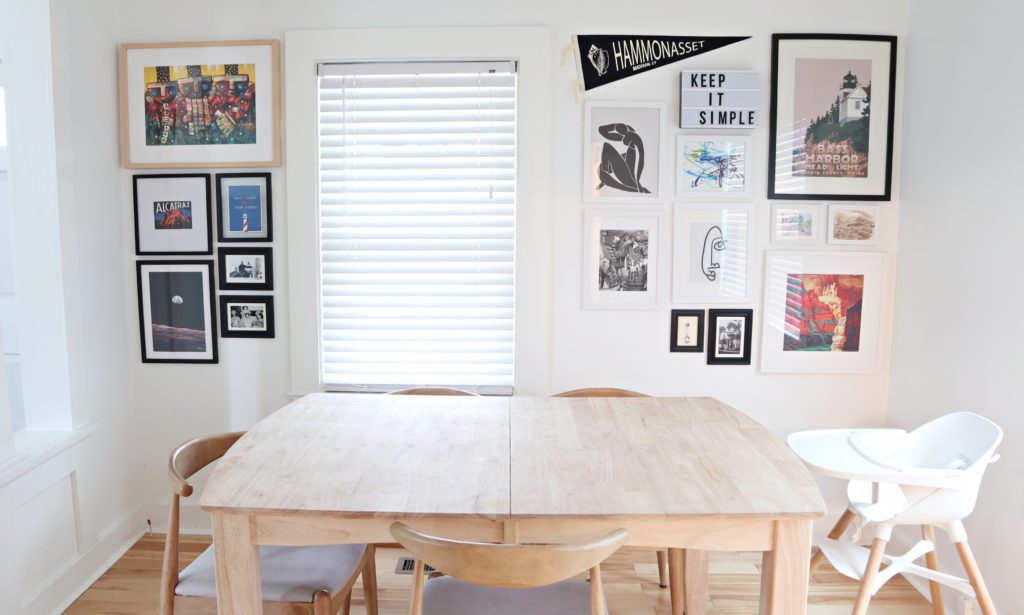
Choose a variety of sizes from small to larger. Make sure not to choose all pieces that are small. Be willing to take a risk with slightly larger pieces. A gallery wall full of small artwork won’t make the impact you want. While it’s fine to mix in small pieces, and I suggest it, just make sure you also have some bigger items mixed in, too.
I also highly suggest you have at least one large “anchor” piece. This should be a large piece of artwork. Think of something that takes up 1/6 to 1/4 of the space.
The last thing I like to suggest is to consider mixing in some non-framed items. These can be a little harder to work with, but look really good mixed into a gallery wall because they add some interest and variety.
Color
Probably one of the biggest questions I got was on colors and if I choose a color scheme. My answer is…kinda. I definitely take into account how the colors work together, but I don’t go TOO matchy-matchy.
So, for this wall, I started with black & white pieces. Obviously black & white pieces will all go together. Next, I had two pieces I wanted to include that were oranges, so they meshed in well. One of them had a little bit of blue which is a complementary color to the orange so I was able to bring in some pieces with some blue.
While I did use some color matching to help pieces look good together, I didn’t stick to it like gospel. I also had a painting with browns and natural tones. I just use it as a general guideline, then get the pieces together and see if they look well together. Sometimes things will surprise you how well they coordinate, sometimes you’ll have to drop something because it doesn’t.
Frames
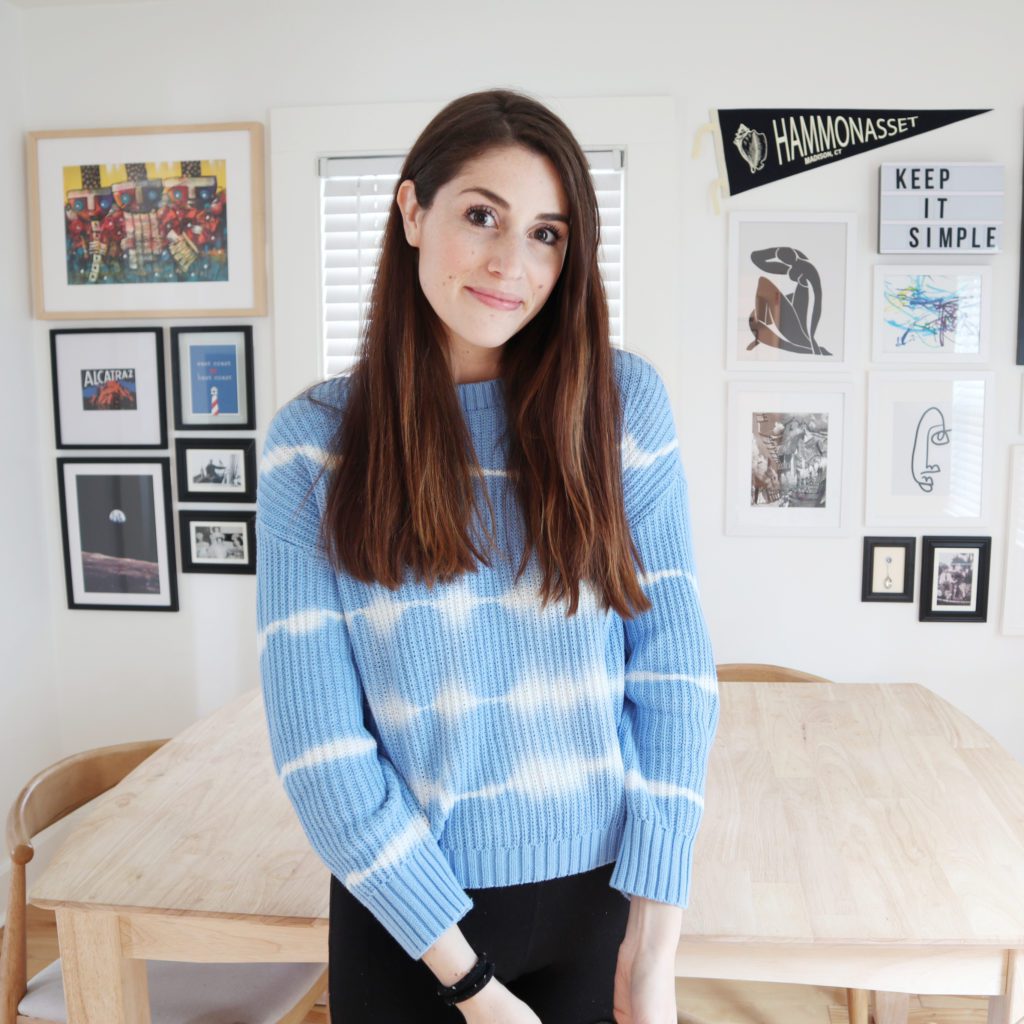
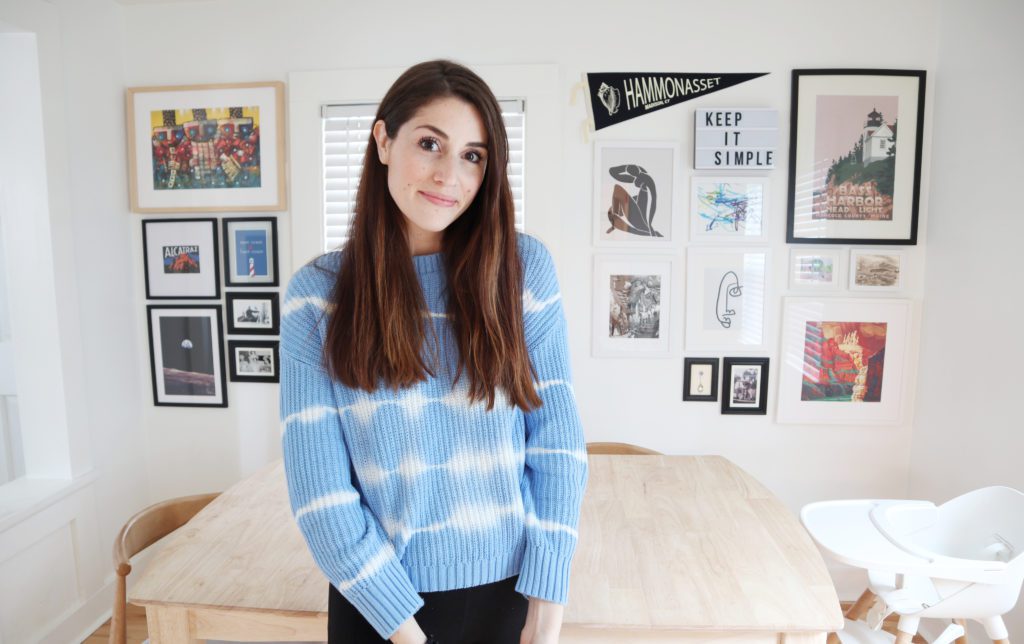
When it comes to choosing frames, I usually try to stick to two colors. In this wall, it was black and whites. I did have one piece that was a wooden frame, and I thought it worked as well, so I went for it. But, general rule of thumb is usually it’s safe to stick with two colors.
If the mismatched thing is hard for you, then opt for one frame color. One frame color will always look cohesive, and you can still pull off a gallery wall look with it. Usually, I suggest white because it’s clean and looks good with most art.
Where to get art and frames?
I like to source my art from a variety of places to really get a mixed look.
- Travel. Personally, we always buy art when we travel. I think it’s the perfect souvenir because it’s easy to travel with, and you can hang it on your wall for years to come. Sometimes we buy a print. Another tip is to look out for postcards when you travel. Many postcards are just touristy photos, but if you keep your eyes open you can often find some that are art (and often from local artists!) A postcard only costs a few dollars and when you get home, put it in a well-matted frame it and looks like real art for not expensive at all.
- Etsy. I like buying printable downloads on Etsy because you get so much variety, you can literally find ANYTHING you want. A printable download is typically only $1-$10. Then, I print them out at Staples, Shutterfly.
- Minted. I like Minted.com to find fine art because it is a network of independent artists. You can find really beautiful stuff and purchase it right in the frame. A little more expensive than the above options, but nice if you want to add in a few special pieces.
- Sentimental pieces. Lastly, it’s nice to add in your own personal story. I think it gives the wall personality. It really makes it more of a conversation. Consider adding in a few family photos (you can print them in black and white if you want.) Maybe you have an old pennant from a grandparent or your mom’s hand mirror from high school. Try to look into your sentimental family items and see what you can add.
Frames
I buy most of my frames from Michaels. I find them to be a good price and decent quality. I usually buy frames with built-in mats so my piece can be matted. But, in some cases, I don’t always want a mat for the picture in which case I don’t use it. Not every picture needs to be in a mat.
For more special pieces of art, unusual sizes, or something we maybe spent more money on than just a print, I like using Framebridge (this referral link gets you 15% off!).
Arranging the Wall
OK! Now comes the fun part – arranging them on the wall! Here’s my steps and tips.
- Map out the space on the floor. I like to use painter’s tape. This way you can arrange things around before committing to any hanging.
- Start with your anchor piece (the biggest piece). I find placing my big pieces first makes it easy to work off of it.
- Just start placing pieces. I personally find working in general columns helps me a lot.
- Stand up, step back, keep moving things around. Sometimes it helps to take a photo of it then look at that.
- Don’t stress too much about making things perfectly aligned. One trick I often use it I align everything along the top – so everything is along the same horizontal line at the top – and then at the bottom, it can trail off. It gives it a feeling of being cohesive but still free-flowing.
IMPORTANT NOTE: One of the biggest mistakes I see people making (and what I did with my first gallery wall I ever did) was putting too much space between the frames. Keep them close because it helps them look like they belong together and aren’t just hanging next to each other. In general, I’d say you want your frames all within about an inch.
Time to Hang
It’s time to hang! This is probably the most nerve-wracking part. I have some tips to make it a little easier.
- Mark out where the frames will be going with painter’s tape. I don’t do this for every piece, but for spots where I really want to know exactly where it should hang, I use a strip of painter’s tape in the width of the frame to make it out. It also allows you to make sure it’s filling the space properly.
- Use Command picture hanging strips. These things are my BFF. I’ve used them for years and never had a frame fall OR ever had them damage my walls. They allow you to hand worry-free. If you mess up you can hang again without worrying about 100 holes in your walls!
- Hang the anchor piece first. It’s easiest to work off your biggest piece.
- Use a level. Obviously, I always use a level to make sure things are straight.
Now all that’s left to do is sit back and enjoy your wall.