I recently took on the challenge of transforming my dining room (with some help). Curious if a professional designer could revamp my space? Read on to find out! I turned to Havenly – a website connecting homeowners with top-notch designers. Today I’m sharing the transformation, the design process, the before-and-after shots, and whether this investment was truly worth it.
The Consult
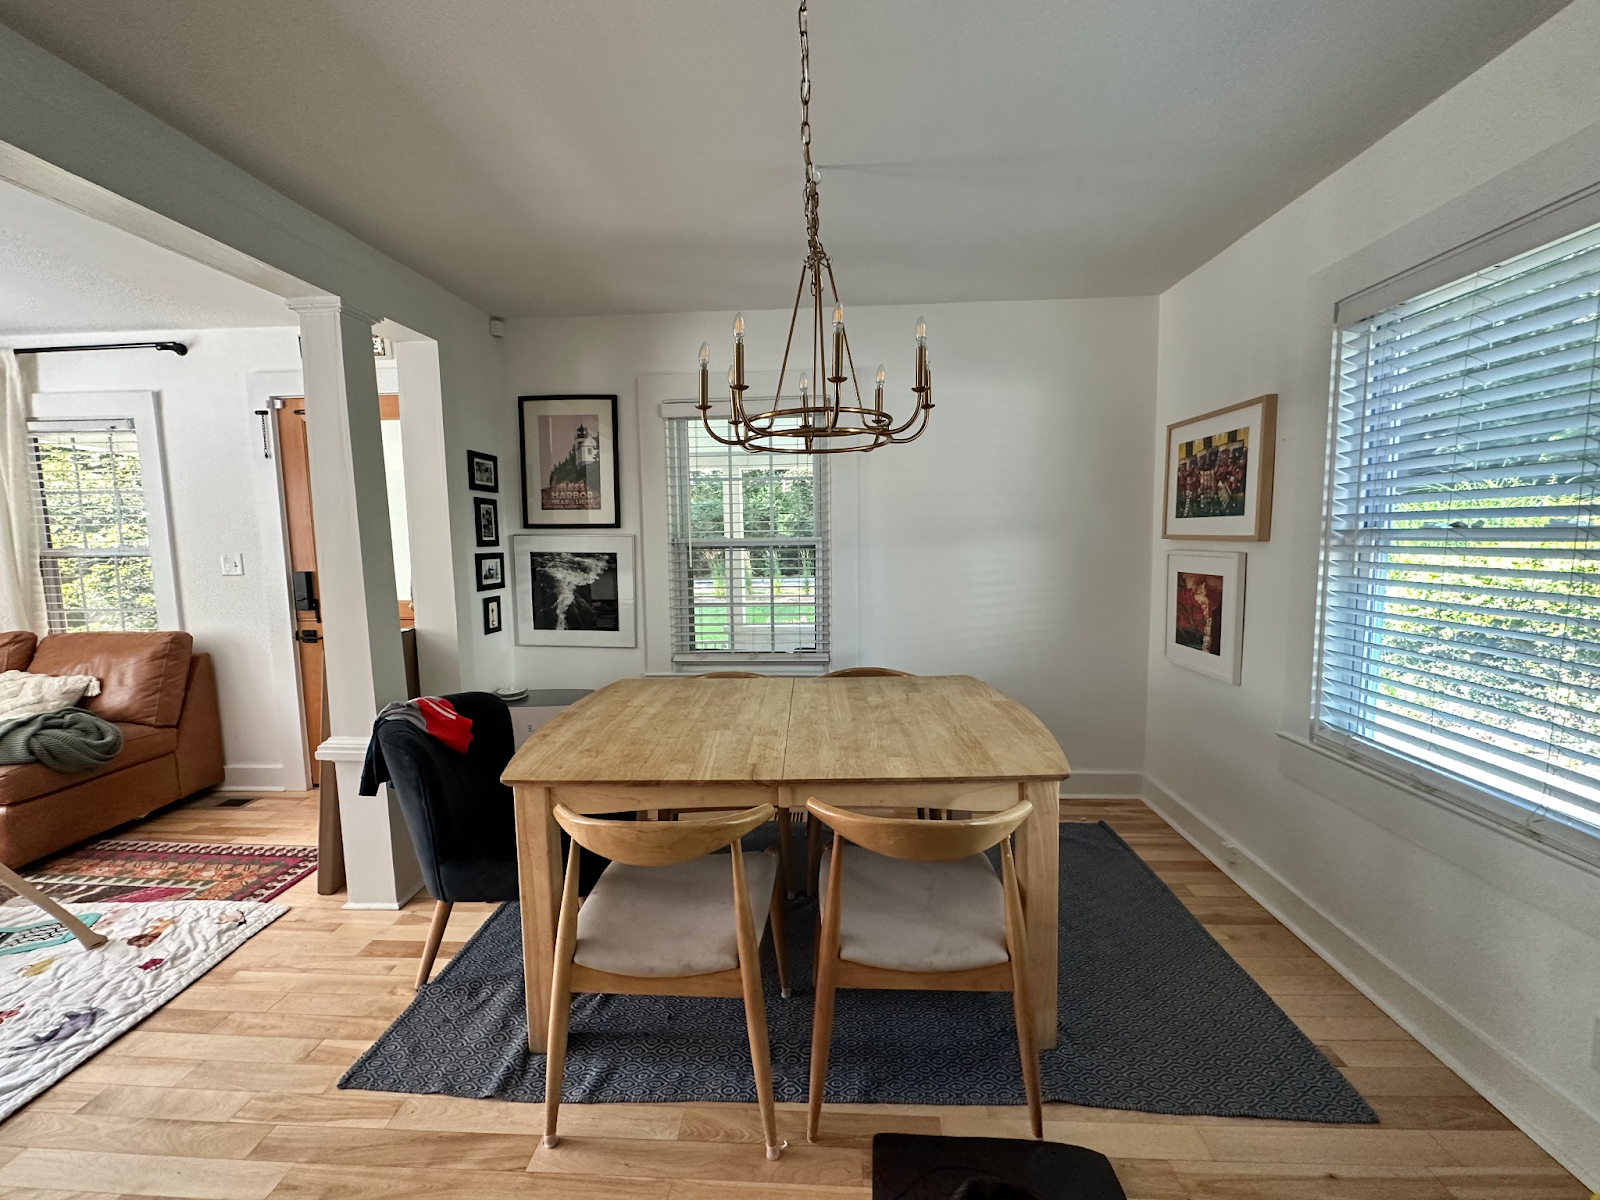
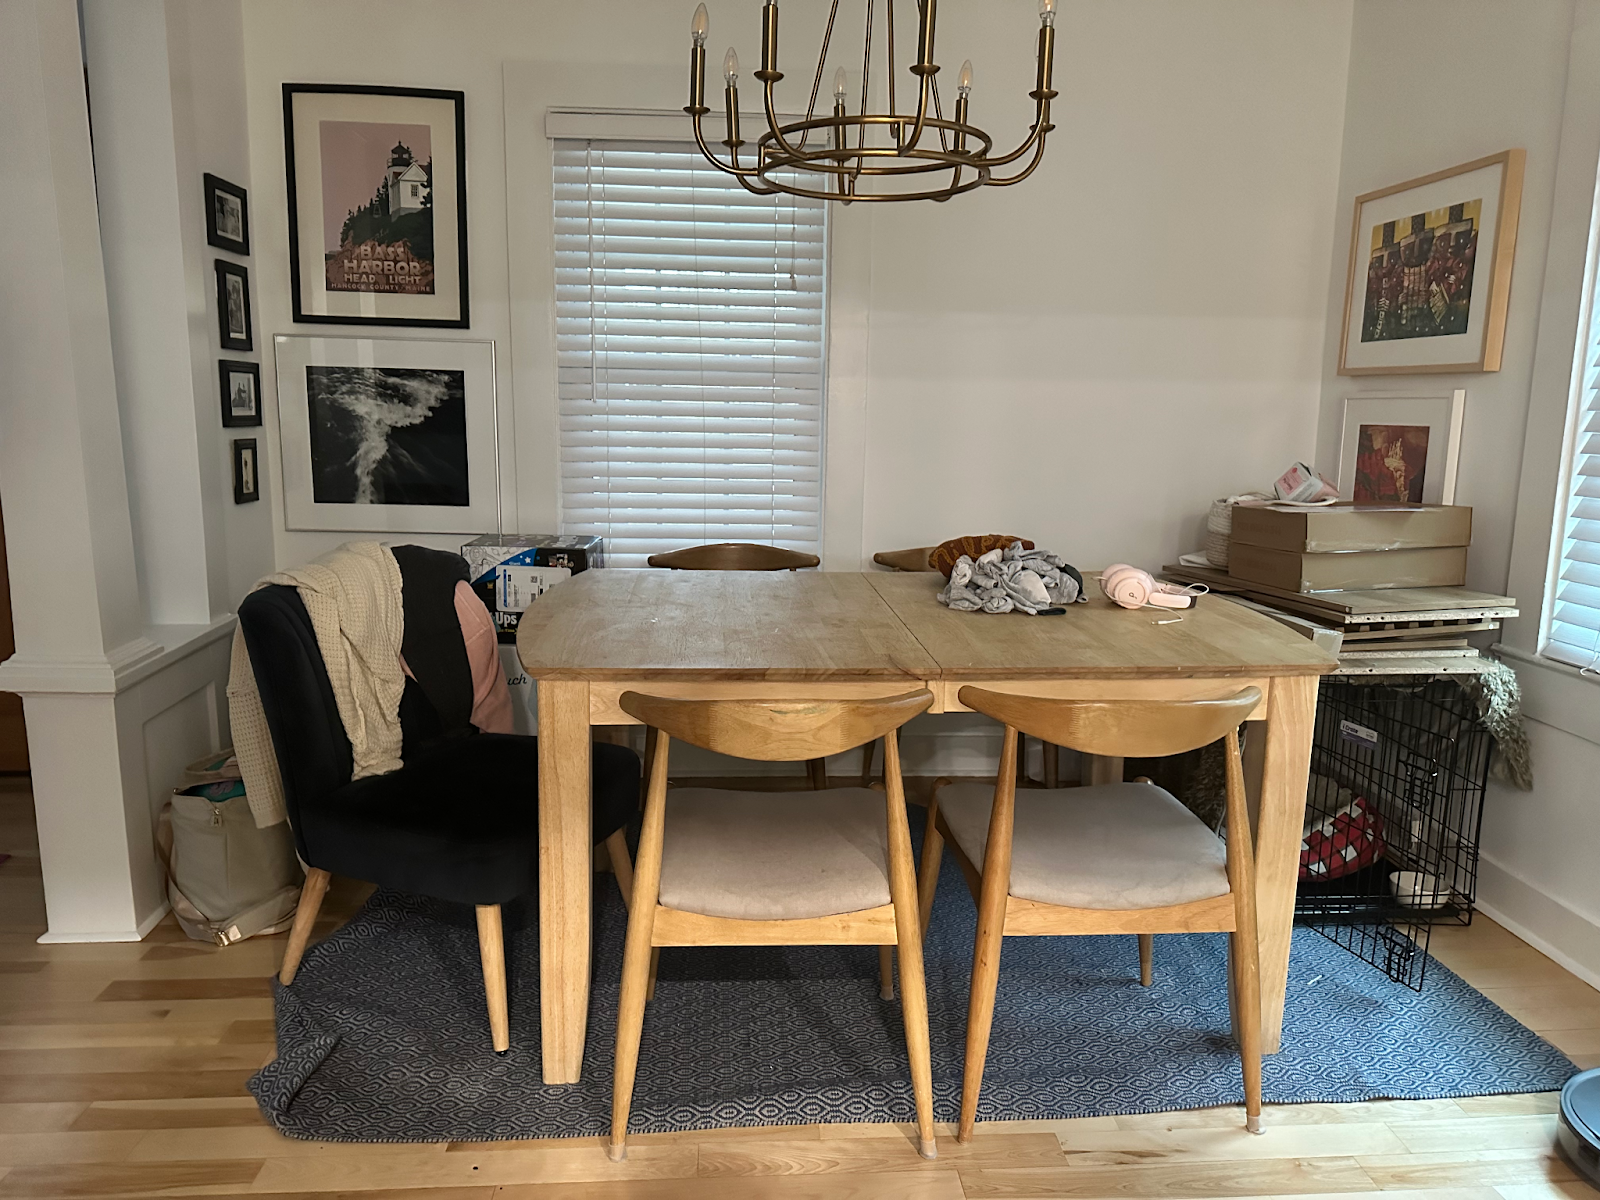
Picture this: a dining space that felt like a misplaced puzzle piece. Yep, that was my dining room. It never quite clicked and always felt like a table dropped in and left to fend for itself. I tried rugs and shifted lights around, but this room always felt like the odd one out in my home. See the space in all its glory here:
Then, I stumbled onto this interior design consultation service by Havenly (not sponsored, but I was hyped to test it out.) Here’s the thing: I’m no stranger to revamping spaces. I’ve lived in a lot of houses and done a lot of rooms so I wasn’t really sure if I needed a “professional.” But last year I hired a professional organizer for our kitchen revamp last year, and boy, was I pleasantly surprised! So even though I was pretty skeptical, I figured I’d give some design gurus a shot.
I opted for the virtual design option (Usually $199 but I caught it on sale for $99).
The Design Process
To start, I filled in tons of style and space-related questions, did some space measuring (yep, I got my tape measure out!), and shared my vision for the space as well as my budget. There was also an option for a 1-on-1 call here to chat about it if you wanted.
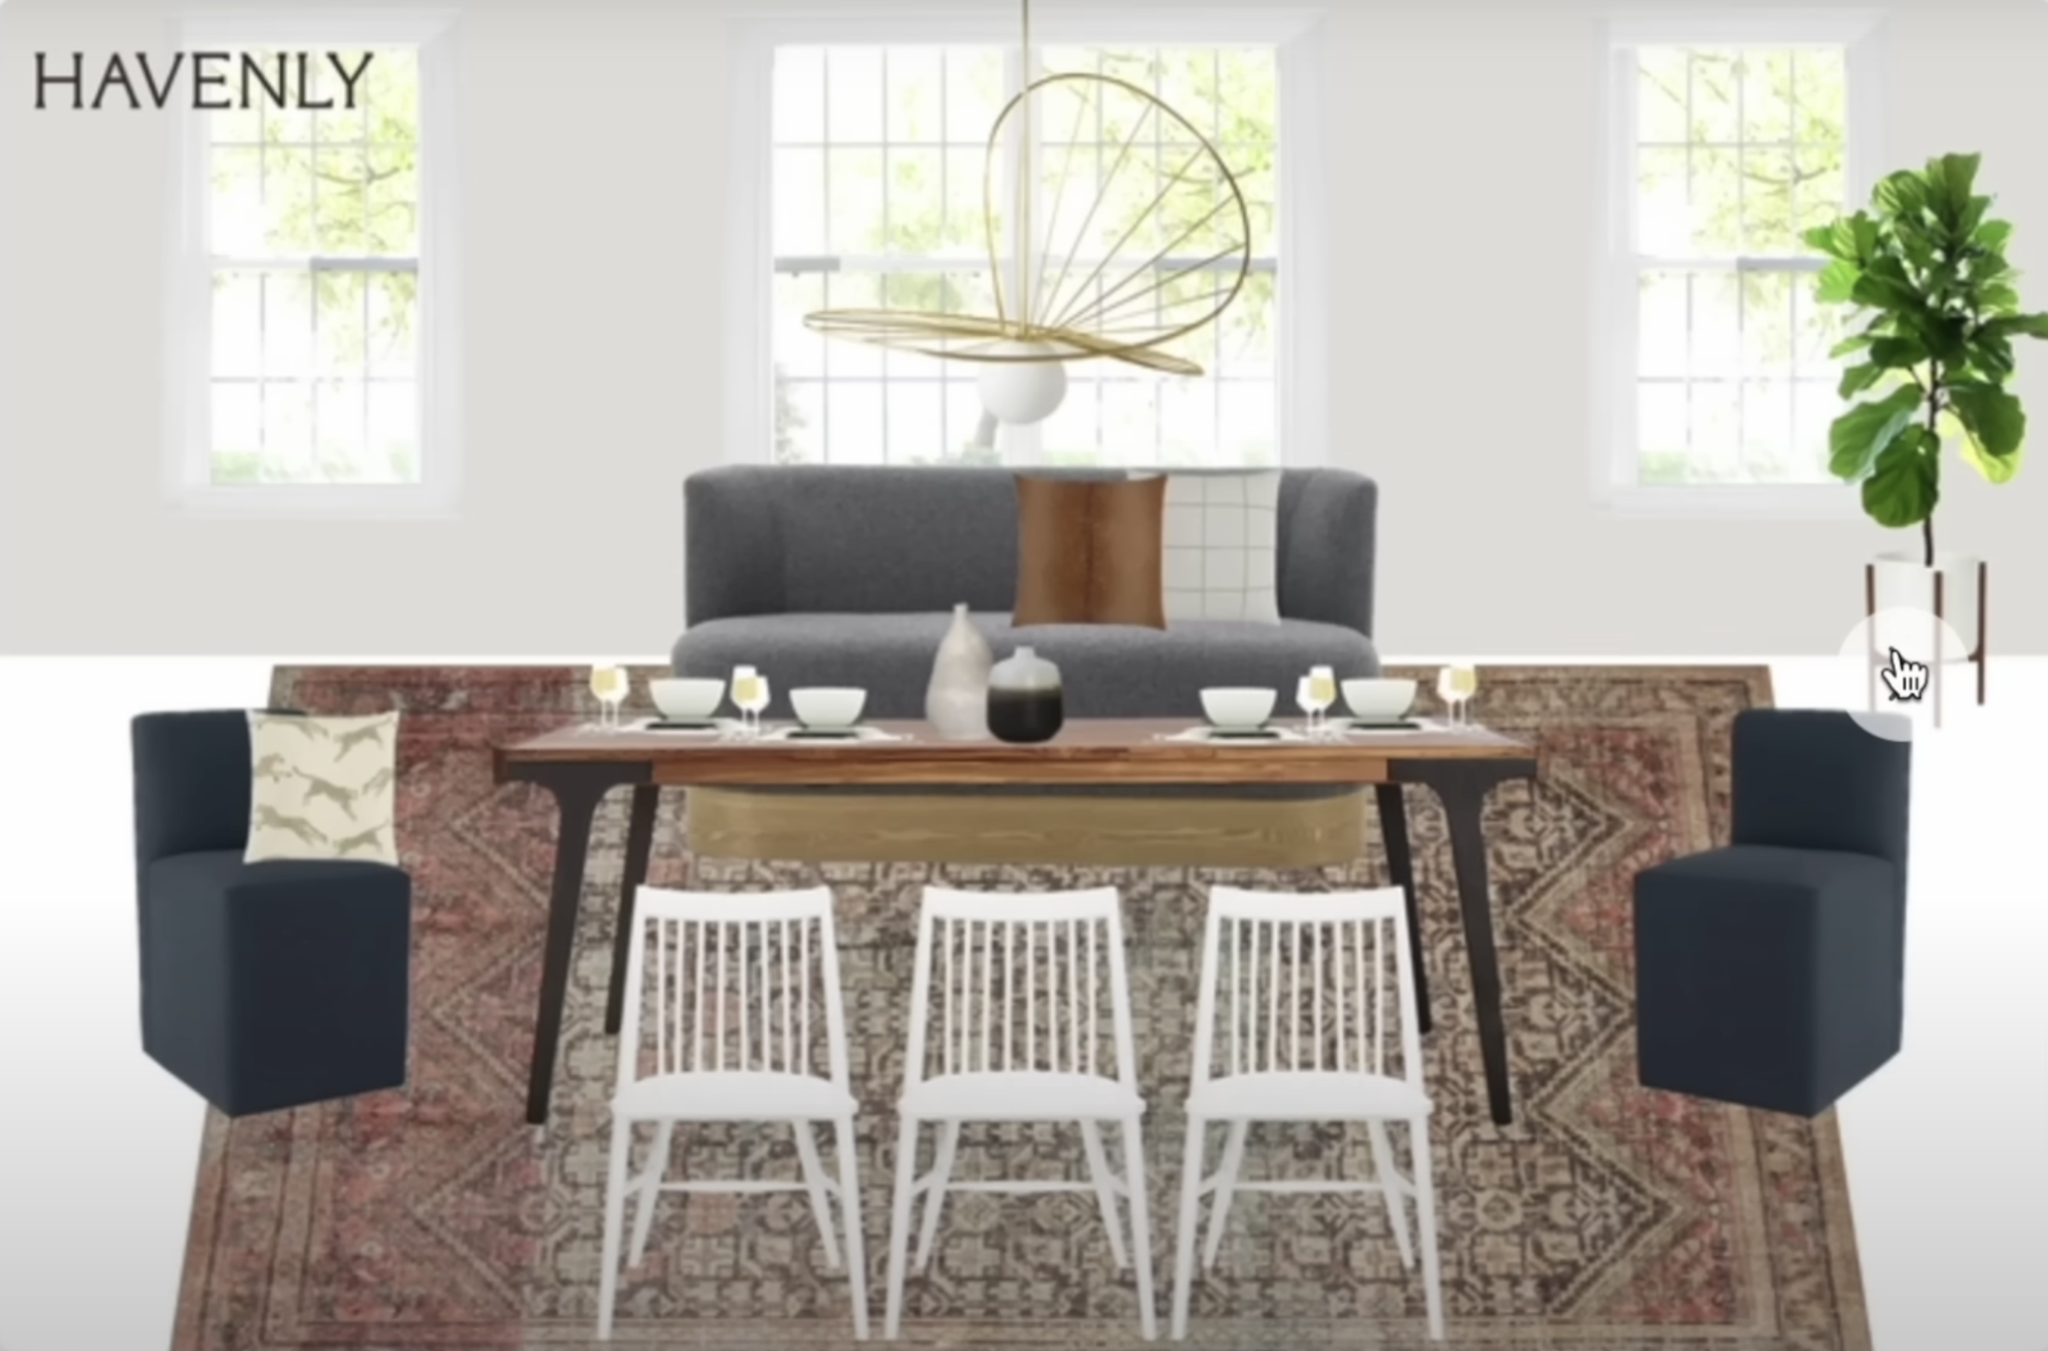
Next, my designer consultant took that info and came up with three proposals for different styles. I rated the design boards: thumbs up for this, thumbs down for that. We fine-tuned the plan, tweaking it until it felt just right.
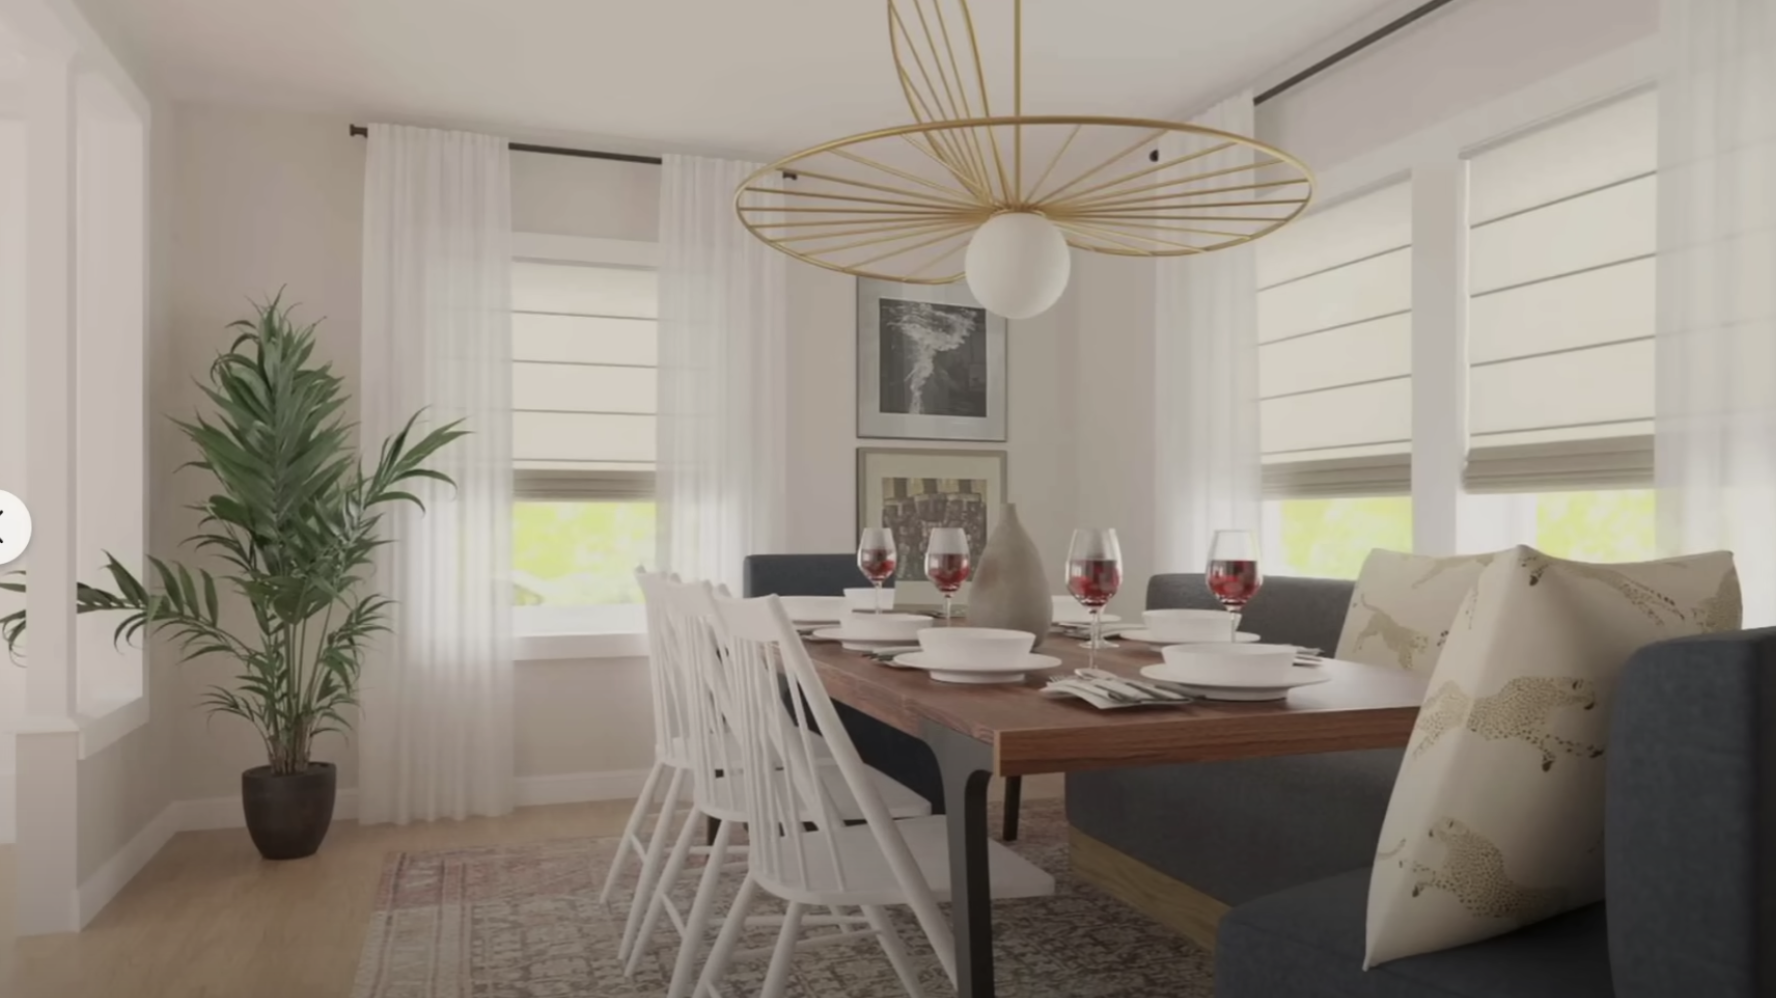
The next thing she did once she had my style nailed down was give me a general layout. Again we chatted back and forth about this until it was right, and then the final design was a full 3D rendering with all of her suggestions on pieces to buy, where to put what, etc.
Now, the stuff they suggest is going to be all a little higher-end (Pottery Barn, West Elm, etc.) so you can totally buy right from their site. Or, you can search around for similar items on a budget, which is mostly what I did. With 3 small kids I’m not interested in a $700 rug they’ll spill mac and cheese on.
Even though I sourced my own items for a lot of it, I followed her suggestions and design very closely trying to get the closest items to what she offered.
The End Result
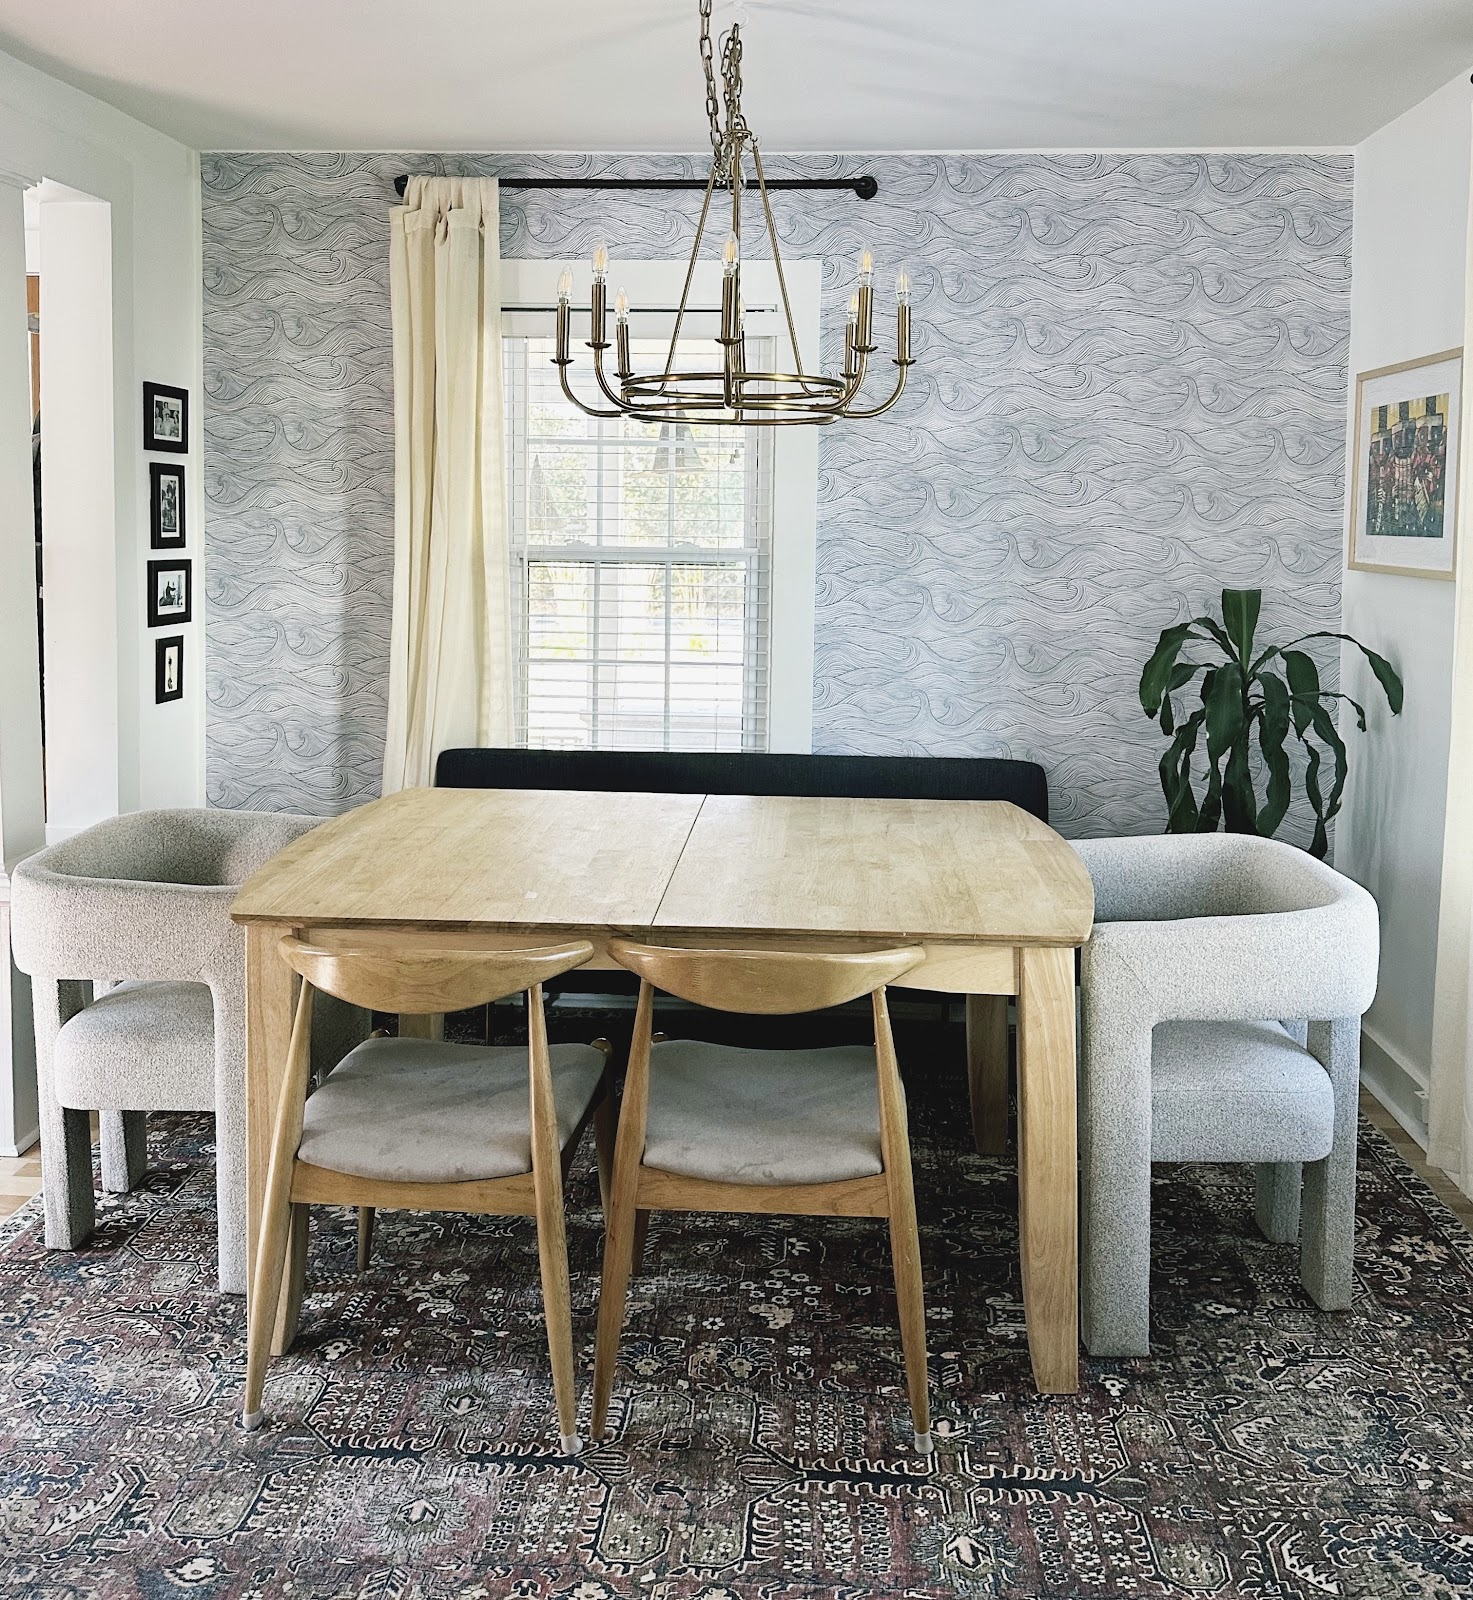
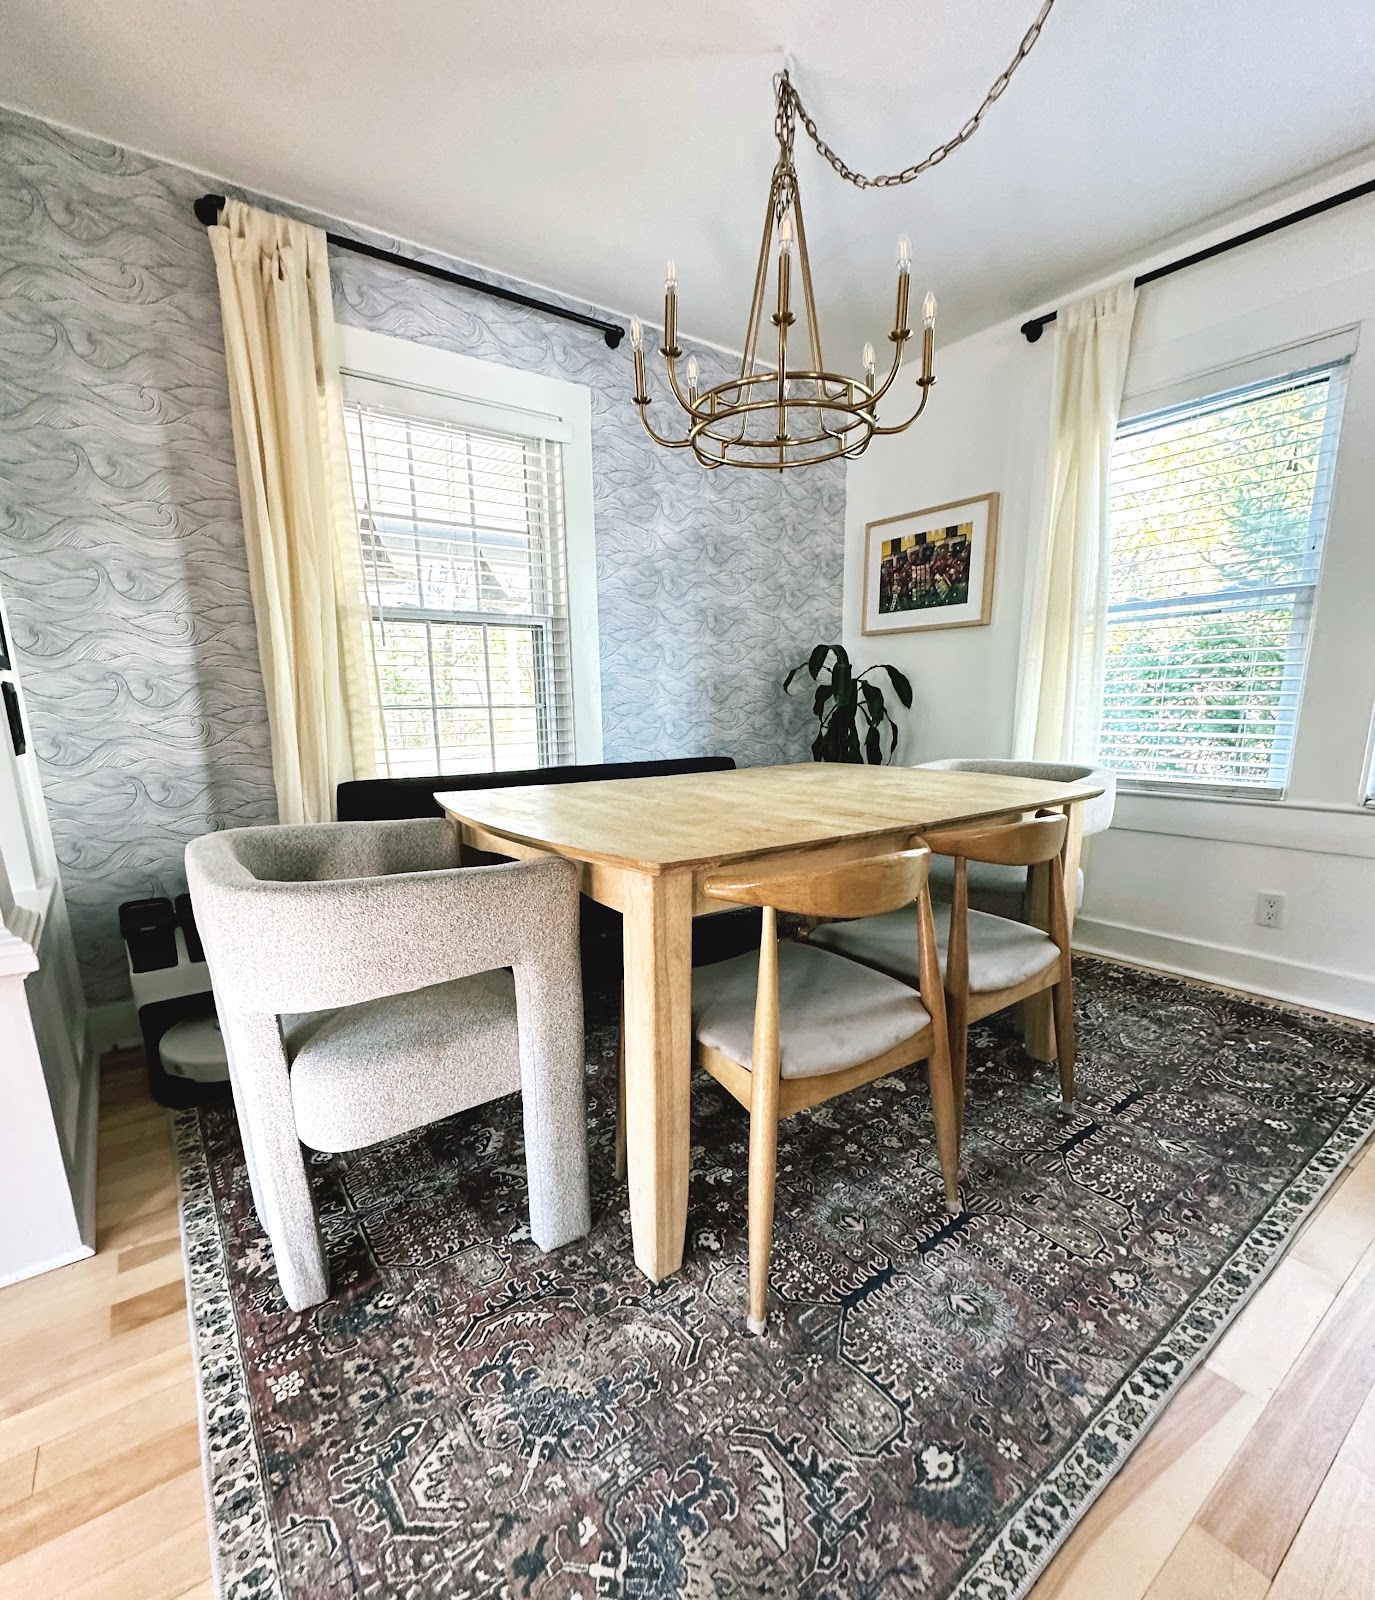
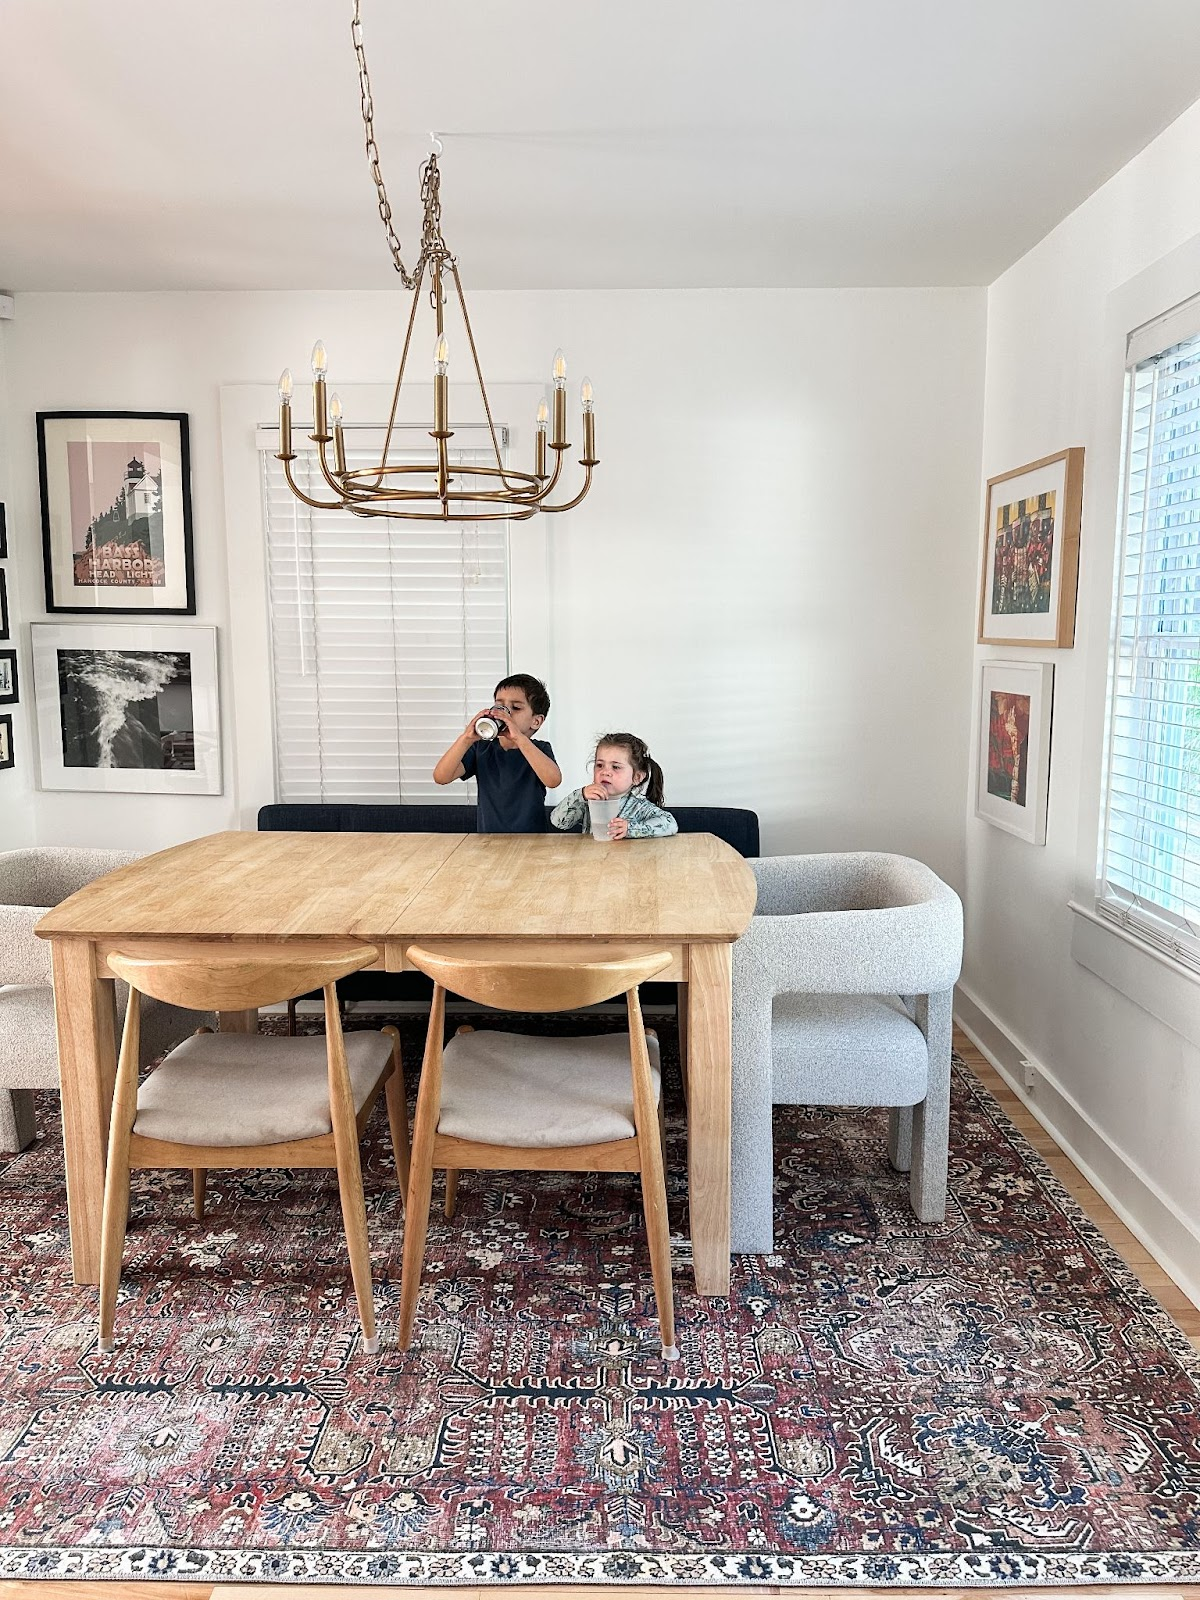
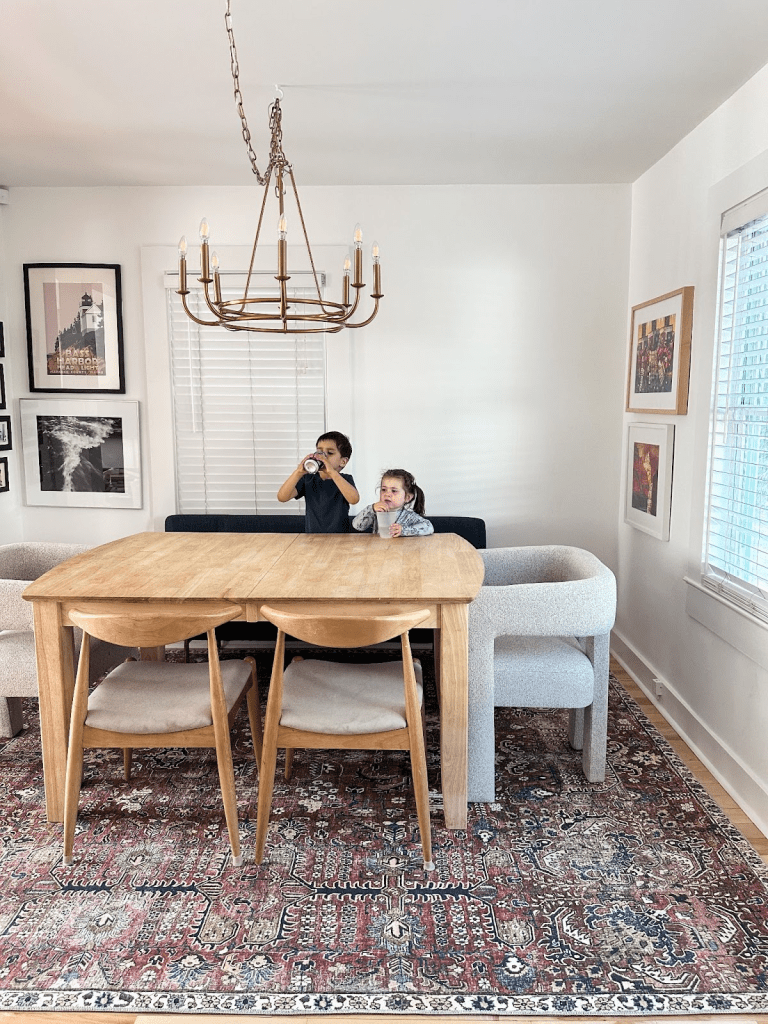
So, the first big change? A rug! I had tried a rug before to anchor the space but turns out I had the completely wrong size! She suggested a much larger one and WOW, a rug that finally fit the space grounded everything. It was like magic—having the right-sized rug made all the difference!
Here’s a link to the rug I got! I bought this budget-friendly rug on Amazon.
Next up, banquette seating. Well, the idea was a game-changer. We opted not to do a built-in banquet (space constraints wouldn’t allow it in my house), but she suggested a bench with a back? Genius! It created this cozy corner that became the kids’ favorite hangout spot. I’m so obsessed with how this came out.
Here’s a link to the end chairs I got!
Next, the window treatments. It’s like adding mascara—the finishing touch that pulls the whole look together.
Here are the curtain rods and window treatments I went with.
I also took my own plunge and added a wave-patterned wall. That wasn’t a suggestion from her, but I actually really like that you can still interject your own style. My wallpaper can be found here.
Guess what? It worked! The space finally felt like it belonged. And the best part? It wasn’t just pretty; it was a practical haven for my three kids. The bench, which was a hit with the kiddos, became their dedicated zone.
Investment
Okay, let’s talk investment. Was it worth it? Absolutely! The professional insights were the magic sauce, but I loved that I could sprinkle in my own touches. Because here’s the thing: I can be stubborn and opinionated (guilty as charged.) But this process was the perfect blend of expert guidance and personal tweaks.
And the cherry on top—it wasn’t a race against time. With a busy household, this makeover moved along at my pace. Eight weeks of slowly building up the dream dining space—totally doable. Take longer if you need to. I love that this process gives you the design and everything you need and then you can buy and put together on your budget and timeline.
So, if you’re on the fence about hiring a design consultant for that tricky space that just doesn’t work, I say—go for it! It’s not just about a room makeover; it’s about finding that sweet spot where style meets functionality.
Here’s the cost breakdown of my dining room makeover:
$99 for the interior designer (I used Havenly)
$138 x 2 Statement Chairs
$213 for the Bench
$140 for the rug
$27 x2 for the curtains
$22 x2 for the curtain rods
$530 for the wallpaper